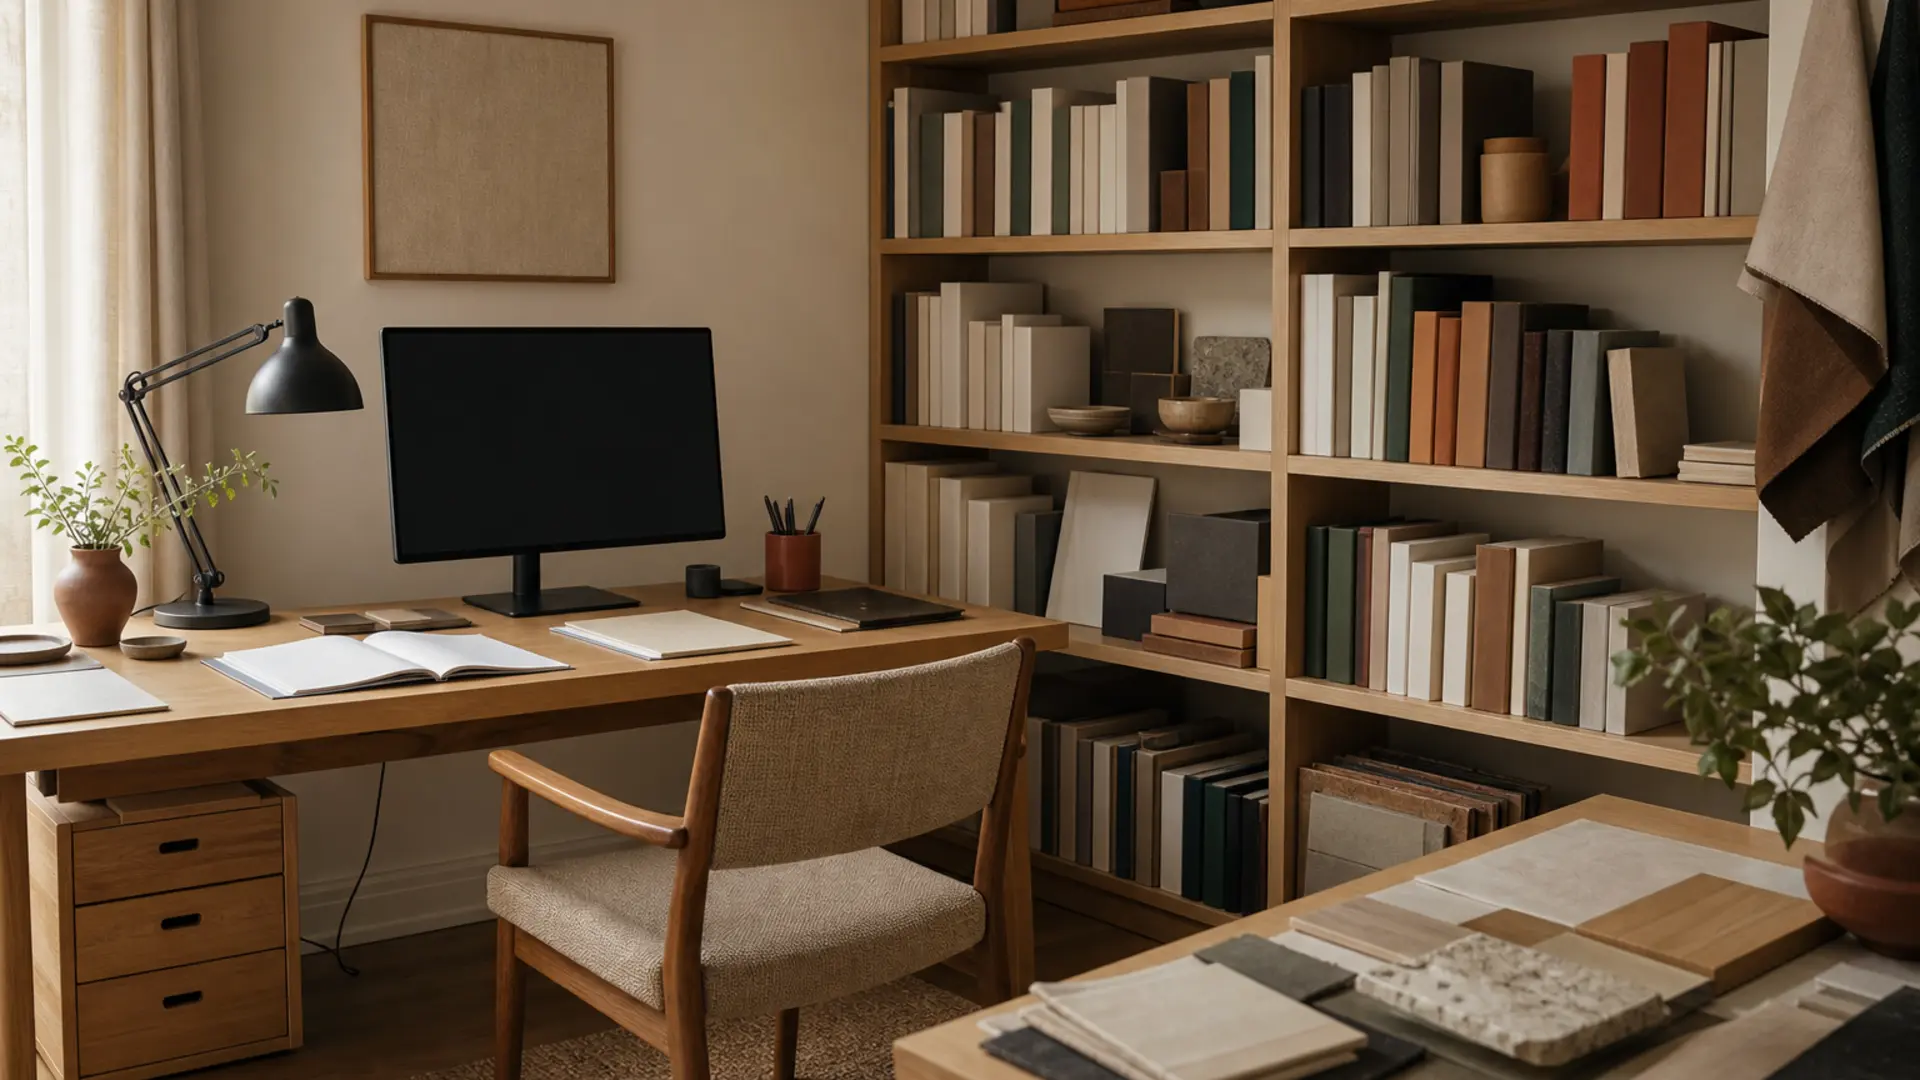
A practical reading of ergonomic setup for gamers
Chair, input devices, and display should support the same base posture.
Movement breaks and position changes are part of the setup.
Some links in this guide are affiliate links. If you buy something through them, we may earn a small commission at no extra cost to you. We only recommend products we've thoroughly researched and genuinely believe are good for gamers.
Here's something nobody tells you when you start gaming seriously: your body will give out before your skills do.
I've been there. Four-hour sessions in a stiff chair, hunched forward, wrists bent at angles that would make a chiropractor weep. The click of a mouse, the ache in my lower back, the burning in my neck after a long Valorant ranked grind. For years I thought this was just part of the hobby — you game, you hurt, you play through it.
Turns out, no. The pain isn't inevitable. It's a signal that your setup is working against you.
Gaming ergonomics is different from office ergonomics in one crucial way: you don't sit still. You lean, you lunge, you tense up during clutch moments, you spend hours in a semi-crouch. An office chair that's perfect for typing spreadsheets might be terrible for the dynamic, high-intensity posture that gaming demands. And gaming chairs — well, we'll get to those. Let's just say the "racing seat" aesthetic isn't doing your spine any favors.
This guide covers everything. We'll talk about chairs (the ones that actually work vs. the ones that just look cool), monitor positioning for competitive play, keyboard and mouse ergonomics that don't wreck your wrists, lighting that doesn't destroy your eyes, and a stretching routine you can do between matches. By the end, you'll have a setup that supports your gaming — not one you're fighting against.
The Gamer's Body: What Hours of Gaming Does to You
Before we talk about solutions, let's talk about what you're actually dealing with. Gaming puts your body through specific, repeatable patterns of stress that office workers don't typically experience.
The "Gamer Neck" (Forward Head Posture)
This is the most common issue in the gaming community. When you're locked in — raiding in WoW, clutching in CS2, building in Fortnite — your head drifts forward. Your chin moves toward the monitor, your shoulders round, your upper back tenses up. It doesn't feel like a big deal in the moment. But the average human head weighs 10 to 12 pounds. For every inch you move it forward from neutral, the effective load on your cervical spine doubles. At 3 inches forward — which most gamers hit during intense sessions — your neck is supporting the equivalent of a 30-pound weight.
That's why you feel that burning knot between your shoulder blades after a long session. That's why turning your head to look at a second monitor hurts. Your neck is being overloaded, hour after hour, day after day.
Wrist and Forearm Strain
Gamers use their wrists differently than office workers. An office worker types — a relatively balanced, symmetrical motion across both hands. A gamer uses a mouse with rapid, repetitive micro-movements and a keyboard (often WASD) with the left hand in a fixed position for hours. This asymmetry creates muscle imbalances.
Mouse wrist is the big one — the burning in the extensor tendons on the top of the forearm, the aching in the base of the thumb. It's a repetitive strain injury pattern that shows up in competitive gamers in their early twenties. Professional CS:GO and Valorant players have talked openly about wrist issues that forced them to change their grip, their sensitivity, sometimes even their dominant hand. Don't wait until you're in that position.
Lower Back Pain
If you game in a chair with poor lumbar support — or no lumbar support — your lower back does a lot of the work your chair should be doing. The lumbar curve of your spine naturally wants to arch inward (lordosis). When your chair doesn't support that curve, your back muscles have to contract continuously to maintain it. After a couple of hours, those muscles fatigue. You start slouching. The slouch transfers load to your spinal discs. Over months and years, that's how you end up with herniated discs, sciatica, and chronic lower back pain that doesn't go away when you stand up.
Eye Strain and Dry Eyes
Gamers blink less. It's a documented phenomenon. When you're focused on a screen — especially during high-stakes moments — your blink rate drops from the normal 15-20 blinks per minute to as low as 5-7. That means your eyes aren't getting the moisture and lubrication they need. Add in blue light exposure, high screen brightness in a dark room, and staring at the same focal distance for hours, and you've got a recipe for digital eye strain (computer vision syndrome). Symptoms include dry eyes, headaches, blurred vision, and difficulty focusing after you step away from the screen.
Poor Circulation
Long sessions in a chair with a fixed seat pan (especially the bucket-style seats on gaming chairs) can compress the back of your thighs and restrict blood flow to your legs. That's the tingling and numbness you feel after a few hours. Over time, it's not just uncomfortable — it's genuinely bad for your cardiovascular health and can contribute to deep vein thrombosis in extreme cases.
The good news: every single one of these problems can be addressed with the right setup. You don't need to stop gaming. You need to stop using a setup that's working against your body.
Chair Setup for Gaming: Height, Recline, Lumbar, Armrests
Your chair is the foundation of your gaming ergonomics. It determines your sitting posture, your leg position, your arm position, and your ability to sustain long sessions without pain. Let's go through the key adjustments in order.
Seat Height
Your feet should be flat on the floor. Not on your tiptoes, not with your legs splayed out to the sides. Flat. Your knees should be at roughly a 90-degree angle — not sharply bent (which restricts circulation) and not extended out straight (which puts stress on your lower back).
The test: sit in your chair and slide your fingers under your thigh at the front edge of the seat. If you can't fit your fingers, the seat is too high. If you can slide them in with lots of room, the seat is too low. You're looking for a snug fit — your fingers should contact both your thigh and the seat.
Most gaming chairs and office chairs have pneumatic height adjustment. If you're between heights (e.g., 5'10" with longer legs), err on the side of a slightly higher seat and add a footrest. The Ergofactor Foot Rest (~$30) is a solid choice for maintaining proper leg angle without switching to a shorter desk.
Recline Angle
Here's where gaming ergonomics diverges from office ergonomics significantly. In an office, the standard recommendation is a 100-110 degree recline — slightly tilted back, supported by the backrest. For gaming, a slightly more upright posture (90-100 degrees) is often better because it keeps you closer to the screen and reduces the distance your arms need to reach for the mouse and keyboard.
But here's the key: you shouldn't be locked into one position for four hours. A good gaming chair or ergonomic office chair lets you recline and lock at multiple positions. Change your recline angle throughout your session. A 90-degree upright position for competitive play, a 110-degree recline for RPGs and story games where you can relax, with some dynamic movement in between.
Lumbar Support
This is the single most important feature in any chair, and it's where most gaming chairs fail. Many "gaming" chairs use a lumbar pillow attached with straps — it's too small, it's positioned wrong, and it slides around. You want built-in, adjustable lumbar support that can be moved both up/down and in/out.
The proper position for the lumbar support is right at the curve of your lower back — typically between your belt line and the bottom of your rib cage. It should feel supportive, not poking. If the support is pushing your hips forward, it's too aggressive. If you don't feel it at all, it's not doing anything.
If your current chair doesn't have adjustable lumbar support, you can use a memory foam lumbar cushion (~$25) as a temporary fix. It's not as good as built-in support, but it's miles better than nothing.
Armrest Position
This is the most neglected adjustment on gaming chairs. Most gamers have their armrests set way too low — or they've removed them entirely because they were in the way.
Your armrests should be set so that your elbows rest at a 90-degree angle with your forearms parallel to the floor. Your shoulders should be relaxed — not shrugged up toward your ears, not slouched forward. If your armrests are too low, your shoulders hunch up to compensate. If they're too high, your elbows get pinned up, leading to shoulder impingement over time.
4D armrests — adjustment up/down, forward/back, left/right, and rotation — are a game-changer for gaming. They let you dial in the exact position that supports your arms during different types of gameplay. Wide armrests (like the ones on the Secretlab Titan Evo or Steelcase Gesture) give you more surface area to spread the load of your forearms.
Gaming Chairs vs. Ergonomic Office Chairs — The Honest Truth
I'm going to say something that might upset the gaming chair industry: most "gaming" chairs are not good for your back.
Here's why. The typical gaming chair — bucket seat design with exaggerated bolsters, stiff foam, a detachable lumbar pillow, and a high-back "racing seat" shape — is designed to look like a car seat, not to support a human spine. Car seats are designed for short-term safety and aesthetics in a vehicle that's in motion. Gaming chairs need to support you for 4+ hours of static sitting. Those are fundamentally different design goals.
The bucket bolsters on gaming chairs pinch your hips and restrict your leg movement. The stiff foam doesn't conform to your body — it pushes against pressure points. The fixed lumbar pillow is almost always positioned too high for shorter gamers and too low for taller ones. The seat pan is often too deep (front to back) for anyone under 5'8", forcing you to sit forward with your lower back unsupported.
There are exceptions. The Secretlab Titan Evo 2022 uses a cold-cure foam that actually holds up over years, and their lumbar support system (a built-in, adjustable mechanism inside the backrest) is genuinely good. The Razer Iskur V2 has an adjustable lumbar curve that's far better than the standard pillow system. But for every Secretlab or Razer, there are twenty cheap "racing" chairs on Amazon with the same bucket design, the same inadequate lumbar pillow, and the same foam that goes flat in six months.
Meanwhile, a high-end ergonomic office chair like the Herman Miller Embody Gaming or the Steelcase Series 2 or the Haworth Fern is designed by ergonomics researchers and physical therapists. The seat pan is adjustable in depth. The lumbar support moves vertically and horizontally. The backrest flexes with your movement instead of fighting it. The foam is designed to maintain its properties over a decade of daily use.
So which should you get?
- Get a gaming chair if: you're under 200 lbs, you game in short sessions (under 2 hours), you care about aesthetics over long-term comfort, or you're on a tight budget and need something under $400.
- Get an ergonomic office chair if: you game for 3+ hours at a time, you're over 200 lbs (gaming chair foam degrades faster under higher weight), you have any existing back pain, or you want a chair that lasts 10+ years.
- Get a hybrid (like Secretlab) if: you want gaming aesthetics but good ergonomics, or you want a chair that sits between the two worlds at a mid-range price.
The bottom line: don't let RGB stitching and a bucket seat convince you that a chair is "for gaming." Your spine doesn't care what your chair looks like. It cares about support.
Desk Height and Monitor Positioning for Gaming
Your desk and monitor setup determines your neck angle, your eye position, and how close you are to the action. Get this right, and you eliminate the two biggest sources of gamer pain: neck strain and eye fatigue.
Desk Height
Standard desk height is 29 to 30 inches. If you're between 5'8" and 6'0", that's probably fine. If you're shorter or taller, you're in trouble. A desk that's too high forces you to raise your shoulders when using your mouse and keyboard — that's how you get trapezius muscle knots. A desk that's too low forces you to hunch forward — that's how you get round shoulders and upper back pain.
The ideal desk height puts your forearms parallel to the floor when your hands are on the keyboard and mouse, with your elbows at 90 degrees. For most people, that means:
- Under 5'6": 26-27 inch desk (may need to cut standard legs or use a smaller desk)
- 5'6" to 5'11": 28-30 inch desk (standard height works)
- 6'0" and above: 30-32 inch desk (look for "extra tall" desks or use risers)
If you can't change your desk height, use a keyboard tray. The VIVO Height-Adjustable Keyboard Tray (~$40) mounts under your desk and lets you dial in the exact keyboard height independently of the desk surface.
Even better: a standing desk. Being able to switch between sitting and standing mid-session is transformative for gaming. The FlexiSpot E6 (~$450) is the most recommended standing desk frame in the mid-range. For a full desktop package, the Uplift V2 (~$600 with a bamboo top) is the premium choice.
Monitor Height and Distance
This is the most important ergonomic adjustment for gamers, and the most commonly botched.
Your monitor should be positioned so that the top third of the screen is at eye level. Not the center of the screen. Not the top edge. The top third. This lets you look slightly downward at the center of the screen, which is the most natural angle for your eyes. When the monitor is too low, you look down at a sharp angle (neck strain). When it's too high, you tilt your head back (also neck strain).
For competitive gaming, your monitor should be about an arm's length away — roughly 20 to 28 inches from your eyes. Closer than that and you're overworking your eye muscles (accommodation). Farther and you start leaning forward to see details, which negates your chair's ergonomic adjustments.
The distance depends on screen size:
- 24-inch monitor: 20-24 inches from your eyes
- 27-inch monitor: 24-30 inches from your eyes
- 32-inch monitor: 30-36 inches from your eyes
If you're using a 32-inch curved monitor for immersion in story games, you can sit slightly closer (the curve helps your eyes track across the screen). But for competitive shooters, a 24-27 inch flat monitor at the closer end of the range is still the sweet spot — it lets you see the entire screen without moving your head.
You absolutely need a monitor arm to get this positioning right. The stock stands that come with monitors are terrible — they're too short, they don't tilt properly, and they waste desk space. A good monitor arm gives you infinite adjustment.
The Ergotron HX (~$150) is the best single-monitor arm on the market — heavy-duty, gas-spring, supports monitors up to 42 inches. The Amazon Basics Premium Single Monitor Arm (~$80) is a close second at half the price. For dual monitors, the VIVO Dual Monitor Desk Mount (~$45) is the budget king — basic but functional.
Dual Monitor Setup for Gamers
If you have two monitors — one for gaming, one for Discord/Spotify/streaming — position your main gaming monitor directly in front of you. The secondary monitor should be angled slightly to the side, with its inner edge meeting the inner edge of your main monitor. The top edges should be at the same height so your eyes don't have to adjust vertically when you glance over.
Don't position your monitors in a V shape that's too wide — you shouldn't have to turn your head more than 30 degrees to see the secondary screen. If you're turning your neck more than that, you're setting yourself up for the gamer neck problem we talked about earlier.
Keyboard and Mouse Ergonomics for Gamers
This is where gaming ergonomics is most different from office ergonomics. Office keyboards are flat, tented, and designed for typing. Gaming keyboards are angled, mechanical, and designed for rapid key actuation. Your mouse needs are also different — high-DPI sensors, light weight, wired (or low-latency wireless).
Keyboard Position and Wrist Angle
The most common mistake gamers make with their keyboard is having it too far forward. Your keyboard should be positioned so that your elbows are at a 90-degree angle and your wrists are straight — not bent upward (extension) or downward (flexion). If your keyboard is too far forward, your arms extend, your shoulders round forward, and your wrists bend upward to reach the keys.
With a standard flat keyboard, your wrists are naturally in slight extension (bent upward). That's not ideal for long sessions. A split mechanical keyboard or a keyboard with negative tilt (feet flipped out so the back is lower than the front) can reduce that extension angle.
The ultimate gaming keyboard for ergonomics is a tented split keyboard — one where the two halves are separated and angled upward. The Moonlander Mark I and the Kinesis Freestyle Pro are the best options for gamers who want full wrist-neutral positioning. If a split keyboard isn't your thing (the learning curve is real), the Razer DeathStalker V2 Pro has a low-profile design that keeps your wrists flatter than a typical mechanical keyboard.
Wrist Rests — Yes or No?
Controversial take: you probably don't need a wrist rest. Wrist rests are designed to keep your wrists in a neutral position while resting — not while typing. If you rest your wrists on the pad while gaming, you're actually compressing the carpal tunnel and putting more pressure on the median nerve.
If you do use a wrist rest, use it as a palm rest — support the meaty part of your palm, not the bony part of your wrist, and lift your hands when you're actually gaming. The Glorious Wooden Wrist Rest (~$25) is a good option — solid surface, doesn't compress, stays cool.
Mouse Grip and Sensitivity
Your mouse grip determines how much tension is in your forearm and wrist. There are three main grips:
- Palm grip: Your whole hand rests on the mouse. Lowest tension, most relaxed, best for ergonomics. Best for low-sensitivity gamers who make larger arm movements.
- Claw grip: Your palm arches, your fingertips press the buttons. Medium tension, common in FPS players. Requires more wrist movement.
- Fingertip grip: Only your fingertips touch the mouse, your palm floats. Highest tension, most precise micro-adjustments. Most likely to cause wrist and forearm strain over time.
If you're a claw or fingertip gripper, you need to pay extra attention to mouse weight and shape. A lighter mouse reduces the load on your fingertips. An ergonomic shape (one that supports your hand's natural curvature) reduces the need to grip tightly.
The Logitech G Pro X Superlight 2 (60g, ambidextrous shape) is the gold standard for competitive gaming and works well for claw/fingertip grip. The Razer DeathAdder V3 Pro (63g, ergonomic right-handed shape) is better for palm grip and larger hands.
Mouse sensitivity also matters for ergonomics. A very high sensitivity means you're making tiny micromovements with your wrist for hours — that's how you get repetitive strain injuries. A lower sensitivity forces you to use your whole arm (shoulder and elbow) instead of just your wrist. Arm aiming is fundamentally more ergonomic than wrist aiming because the larger muscles (shoulder, chest, back) share the load instead of concentrating everything in the small muscles of the forearm.
A good range for most competitive games is 400-800 DPI combined with an in-game sensitivity that gives you roughly 12-20 inches per 360-degree turn. If you're currently playing at 1600+ DPI with a tiny wrist flick to do a full rotation, consider dropping your sensitivity gradually over a few weeks. Your wrist will thank you.
A large mousepad is essential for low-sensitivity gaming. The SteelSeries QcK Heavy (3XL, ~$45) gives you a 36x16 inch surface — plenty of room for arm aiming without running out of desk space.
Audio and Eye Strain: Headphones, Blue Light, and Brightness
Two things that seem unrelated to ergonomics but absolutely affect your body during gaming: what you're putting on your head and what your eyes are processing.
Headphone Clamping Force
If you wear a gaming headset for 4+ hours, you know the feeling — that dull ache around your ears, the pressure on the top of your head, the heat buildup. This isn't just discomfort; it's an ergonomic issue.
Headsets with high clamping force (the pressure the headband exerts on the sides of your head) can cause tension headaches, jaw pain, and even contribute to TMJ issues over time. The heavier the headset, the worse it is — especially if the weight isn't distributed well.
What to look for:
- Weight. Under 300g is the sweet spot. Under 250g is excellent.
- Clamping force. You shouldn't feel pressure on your temples. Look for headsets with a suspension headband (a fabric strap that distributes weight across the top of your head instead of clamping the sides).
- Earpad material. Leatherette traps heat. Velour or mesh breathes better and reduces sweat buildup during long sessions.
- Open-back vs. closed-back. Open-back headsets are lighter and more breathable, but they leak sound (not ideal for voice chat in a noisy room). Closed-back isolates sound but traps more heat.
The SteelSeries Arctis Nova Pro (290g, suspension band, breathable fabric earpads) is the best ergonomic gaming headset on the market. The Philips SHP9500 (~$70, 260g, open-back, velour pads) is an amazing budget option — it's technically an audiophile headphone, not a gaming headset, but it's incredibly light and comfortable, and you can add a VModa BoomPro microphone (~$35) to turn it into a gaming headset.
If you want maximum comfort and can afford it, the Hifiman Sundara (~$300, 250g, open-back) is even lighter and has the best soundstage under $500. You'll need a separate mic or desk mic setup.
Blue Light and Screen Brightness
Blue light from screens suppresses melatonin production and disrupts your circadian rhythm. For gamers who play primarily in the evening — which is most of us — this is a real problem. It's not just about sleeping worse; it's about eye fatigue compounding over time.
Here's what actually works:
- Use your monitor's built-in blue light filter. Most gaming monitors have a "low blue light" or "reading mode" setting. Enable it. The image will look slightly warmer, but you'll adapt within minutes.
- Don't max out your brightness in a dark room. Your monitor brightness should roughly match the ambient light in the room. A 100% brightness monitor in a dark room forces your pupils to constrict constantly, leading to eye strain and headaches. Lower it to 60-70% as a starting point and adjust from there.
- Use software solutions. f.lux (free) adjusts your screen's color temperature based on time of day. Windows has a built-in "Night Light" feature. Both work well.
You can also get blue light filtering glasses specifically for gaming. The Gunnar Intercept (~$60) and Gunnar Optiks Torpedo (~$70) are made specifically for gaming — they have a slight magnification (about 0.2) that reduces accommodation strain at typical monitor distances.
But here's an unpopular truth: blue light glasses aren't magic. The most effective thing you can do for eye strain is to take 20-second breaks every 20 minutes and look at something 20+ feet away (the 20-20-20 rule). That's harder than buying glasses, but it works better.
Lighting for Gaming: Bias Lighting, RGB That Doesn't Hurt
Most gamers play in the dark. It's immersive, it makes the monitor pop, and it looks good on stream. But it's terrible for your eyes.
The problem is contrast ratio. When your monitor is the only light source in the room, your pupils have to constantly adjust between the bright screen (100+ nits in the center) and the pitch-black room around it. That rapid, continuous adjustment fatigues your eye muscles and contributes to headaches and dry eyes.
The fix is bias lighting — a light source positioned behind your monitor that illuminates the wall behind it. This reduces the contrast between the screen and the dark background, which reduces eye strain significantly.
Bias lighting has been standard in television setups for years (Philips Ambilight, anyone?), but it's only recently caught on in gaming. The principle is the same: balanced ambient light = less eye fatigue.
The gold standard for gaming bias lighting is the Philips Hue Play Gradient Lightstrip (~$100). It's pricey, but it's the only bias lighting that actually follows what's on your screen (via the Hue Sync app), creating an immersive halo effect that extends your peripheral vision. For a simpler option, the Govee Immersion TV LED Backlight (~$55) also does screen-matching colors at half the price.
If you just want a static warm-white bias light — which is actually better for pure eye strain reduction than RGB — the MediaLight Mk2 Flex (~$30) is the recommendation from the International Color Consortium for accurate CRI bias lighting. It's not flashy, but it's the best thing you can do for your eyes during long sessions.
RGB Lighting — Use It Wisely
RGB lighting gets a bad rap from an ergonomics perspective, but it's not inherently bad. The problem is how people use it: bright direct-light RGB strips on the desk surface pointing at your eyes, or rainbow strobe effects that create visual noise.
RGB lighting done right:
- Indirect. Light strips behind the desk, under the monitor, or along the back of the desk — never pointing toward your face.
- Static or slow pulse. Avoid rapid color cycling or flashing effects. They're not just distracting — they can trigger migraines in susceptible people.
- Warm colors. Stick to warm white (2700-3500K), amber, or dim deep blues. Avoid bright reds and greens at high intensity — they create glare and force your pupils to contract.
A simple desk lamp with a warm LED bulb positioned to the side of your monitor provides better ambient lighting than any RGB strip. The Benq ScreenBar Halo (~$110) is the ultimate gaming desk lamp — it mounts on top of your monitor, shines downward (no screen glare), has ambient lighting on the back, and includes a wireless controller. The Xiaomi Mi Computer Monitor Light Bar (~$40) is a solid budget alternative.
5-Minute Stretching Routine for Gamers (Between Matches)
No amount of expensive gear can replace movement. The best chair in the world can't undo the effects of sitting in a static position for 4 hours. You need to move, and you need to do it regularly.
Here's a 5-minute routine designed specifically for gamers. Do it between matches, during loading screens, or whenever you queue. It targets the specific muscle groups that gaming overloads.
1. Neck Side Stretch (30 seconds each side)
Sit up straight. Drop your right ear toward your right shoulder. Don't raise your shoulder to meet your ear — let gravity do the work. You should feel a gentle stretch on the left side of your neck. Hold for 30 seconds. Switch sides.
Why it helps: Counteracts forward head posture. Releases the upper trapezius muscles that get tight from holding your head forward.
2. Chin Tucks (10 reps, 3-second hold)
Sit tall. Pull your chin straight back (as if you're making a double chin — yes, that's the motion). Hold for 3 seconds. Release. Repeat 10 times.
Why it helps: This is the single best exercise for gamer neck. It activates the deep neck flexors that counteract forward head posture and decompresses the cervical spine.
3. Shoulder Blade Squeeze (10 reps, 5-second hold)
Sit up straight. Squeeze your shoulder blades together as if you're trying to hold a pencil between them. Hold for 5 seconds. Release. Repeat 10 times.
Why it helps: Counteracts the rounded shoulders that come from reaching forward to your keyboard and mouse. Opens up the chest and strengthens the upper back muscles that support good posture.
4. Wrist Flexor Stretch (30 seconds each side)
Extend your right arm straight in front of you with your palm facing up. Use your left hand to gently pull your fingers down toward the floor. You should feel a stretch along the inside of your forearm. Hold for 30 seconds. Switch sides.
Why it helps: Relieves tension in the forearm flexors that work continuously during mouse and keyboard use. Prevents the "gamer claw" feeling.
5. Wrist Extensor Stretch (30 seconds each side)
Same position, but this time face your palm down. Use your left hand to gently push your fingers down toward the floor. Hold for 30 seconds. Switch sides.
Why it helps: Relieves tension in the forearm extensors that control fine mouse movements. Critical for preventing "mouse wrist" repetitive strain.
6. Seated Figure-Four Glute Stretch (45 seconds each side)
Sit tall. Cross your right ankle over your left knee (figure-four position). Gently lean forward from your hips — not your lower back. Hold for 45 seconds. Switch sides.
Why it helps: Sitting for hours tightens your hip flexors and glutes, which pulls on your lower back and contributes to the classic gamer slouch. This stretch opens up the hips and relieves lower back tension.
7. Thoracic Spine Rotation (5 reps each side)
Sit tall. Place your left hand on your right knee. Twist your upper body to the left, looking over your left shoulder. Hold for a breath. Return to center. Repeat 5 times, then switch sides.
Why it helps: Gaming posture tends to lock up the mid-back (thoracic spine), limiting your ability to sit up straight. This rotation mobilizes the thoracic spine and makes good posture feel more natural.
Total time: about 5 minutes. Do this once per hour of gaming. Set a timer on your phone or use your game's queue time. Your body will feel the difference within a week.
Product Recommendations by Budget
Here are the products I recommend for building an ergonomic gaming setup, organized by budget level. These aren't affiliate grabs — they're products that genuinely solve specific problems for gamers.
Razer DeathAdder V3 Pro
Best mouse for ergonomics · ~$150 · Amazon
63 grams. Ergonomic right-handed shape designed with esports pros. The hump supports the palm naturally, and the side buttons are positioned so you don't have to reach. The optical switches require less actuation force than mechanical switches, reducing finger fatigue during rapid clicking. Compatible with Razer HyperPolling for 4K Hz polling (smoother tracking means less micro-adjustment strain).
Best for: Palm grippers, medium-to-large hands, competitive FPS players.
Secretlab Titan Evo 2022
Best gaming chair · ~$550 · Amazon
The Titan Evo is the only gaming chair I can recommend without reservations. The cold-cure foam maintains its density for years (no sagging seat pan). The built-in lumbar support adjusts vertically and with tension (no pillow to slide around). The seat pan is available in three sizes (Small, Regular, XL) to match your height. 4D armrests with magnetic covers. The magnetic memory foam head pillow is actually usable — most gaming chair head pillows push your head forward, but this one supports the curve of your neck.
Best for: Gamers who want the racing aesthetic but need actual ergonomics, people between 5'4" and 6'9" (pick the right size).
Herman Miller Embody Gaming
Best overall ergonomic chair for gaming · ~$1,700 · Amazon
The Embody was designed with input from physical therapists, and the "gaming" version adds the same ergonomics in a darker colorway with slightly more breathable fabric. The Pixelated Support system distributes pressure across your entire back rather than concentrating it in one spot. The backrest follows your movement — you can lean, twist, and shift without losing support. The seat pan adjustability is unmatched (depth and angle). 12-year warranty.
The Embody is not cheap, but it's one of the few products that genuinely justifies its price. If you spend 6+ hours a day gaming — or 12+ hours gaming + working from the same setup — its long warranty and broad adjustability may make the cost easier to justify, but comfort and fit should be weighed against your budget.
Best for: Serious gamers with back pain, anyone who sits 8+ hours a day, people who want a 10-year+ chair.
Ergotron HX Monitor Arm
Best monitor arm · ~$150 · Amazon
Heavy-duty gas spring that supports monitors up to 42 inches. Infinite adjustability in height, tilt, swivel, and rotation. The tension adjustment is tool-free (many arms require an Allen key). The cable management channel runs inside the arm — no external clips. This is the arm that will survive multiple monitor upgrades.
Best for: Anyone who wants perfect monitor positioning and has a monitor over 20 lbs.
SteelSeries Arctis Nova Pro
Best ergonomic gaming headset · ~$350 · Amazon
290g with suspension headband — the weight distributes across the top of your head instead of clamping the sides. The earpads use a breathable fabric that doesn't trap heat. The ClearCast Gen 2 microphone is retractable (one less thing hanging on your desk). The DAC/amp base station includes a battery-swapping system for endless wireless use — no need to plug in mid-session.
Best for: Long gaming sessions (4+ hours), competitive audio, anyone who gets hot ears from leatherette pads.
FlexiSpot E6 Standing Desk Frame
Best standing desk for gaming · ~$450 · Amazon
Dual motors, 330 lbs lifting capacity, programmable height presets, and a smart anti-collision system. The T-frame design is more stable than C-frames at standing height (less wobble when you're leaning into your game). The range goes from 28 to 48 inches — accommodates both sitting and standing for most heights. Add a 60x30" desktop from IKEA or a butcher block from Home Depot and you've got a pro-level gaming desk for under $600.
Best for: Gamers who want to switch between sitting and standing mid-session, tall gamers who need a higher desk.
Benq ScreenBar Halo
Best gaming desk lamp · ~$110 · Amazon
Mounts on top of your monitor (zero desk space). The asymmetrical optical design shines light downward without reflecting off your screen. The ambient backlight reduces eye strain by illuminating the wall behind the monitor — it's bias lighting and task lighting in one device. Wireless round controller lets you adjust brightness and color temperature without reaching for the lamp.
Best for: Every gamer. This is the single best lighting upgrade you can make.
Philips Hue Play Gradient Lightstrip
Best bias lighting for gaming · ~$100 · Amazon
Light strip with three addressable zones that sync with your screen content via the Hue Sync app. Mounts to the back of your monitor with included brackets. Expands the color of your game into your peripheral vision, reducing the contrast between screen and dark wall. Requires a Hue Bridge ($50) for full functionality, but it's the only bias lighting that actually improves immersion rather than just providing ambient light.
Best for: Gamers who want premium bias lighting, immersive single-player experiences, streamers.
Comparison Table
| Product | Category | Price | Key Ergonomics Feature | Best For | Editor's Choice Razer DeathAdder V3 Pro | Mouse | ~$150 | 63g, ergonomic shape, low-force optical switches | Palm grippers, large hands | Editor's Choice Logitech G Pro X Superlight 2 | Mouse | ~$160 | 60g, ambidextrous, low click force | Claw/fingertip grip, competitive FPS | Editor's Choice Secretlab Titan Evo 2022 | Chair | ~$550 | Built-in adjustable lumbar, cold-cure foam, 4D armrests | Gaming aesthetic + ergonomics hybrid | Premium Pick Herman Miller Embody Gaming | Chair | ~$1,700 | Pixelated Support back system, dynamic backrest flex, seat depth adjust | Serious gamers, existing back pain, 8+ hr/day sitters | Editor's Choice Razer Iskur V2 | Chair | ~$500 | Adjustable 6D lumbar curve, dense foam | Gamers who want Razer ecosystem, lumbar-focused support | Premium Pick Ergotron HX Monitor Arm | Monitor Arm | ~$150 | Gas spring, tool-less tension, supports up to 42" | Perfect monitor positioning, large monitors | Editor's Choice SteelSeries Arctis Nova Pro | Headset | ~$350 | 290g, suspension headband, breathable fabric earpads | Long sessions, competitive audio | Best Value FlexiSpot E6 | Standing Desk | ~$450 | T-frame stability, dual motors, 28-48" height range | Sit-stand gaming, tall gamers | Editor's Choice Benq ScreenBar Halo | Lighting | ~$110 | Asymmetrical light, zero screen glare, ambient backlight | Eye strain reduction, evening gaming | Editor's Choice Philips Hue Play Gradient | Lighting | ~$100 | Screen-synced bias lighting, 3-zone color, immersive halo | Immersive gaming, stream setup, RGB aesthetic |
|---|
Common Mistakes in Gaming Setups
I've seen hundreds of gaming setups — on Reddit, in real life, in pro gaming houses — and the same mistakes show up over and over. Here are the ones to avoid.
Mistake #1: Following "Pro" Setup Advice Blindly
Pro gamers spend 10+ hours a day in their chair, but they also have coaches, physical therapists, and sponsors providing whatever gear they want. The fact that TenZ uses a specific monitor height or s1mple has his chair at a specific angle doesn't mean those settings are right for you. Pros have already built the muscle memory and tolerance for specific positions. Copying their setup when you're a weekend warrior is like copying a pro swimmer's training volume — it'll break you.
Instead of copying pros, use their setups as a starting point and adjust based on your own body. Your seat height, your arm angle, your monitor distance — they depend on your height, your arm length, your vision. There's no universal perfect position.
Mistake #2: Gaming in Complete Darkness
We covered this above, but it bears repeating. A pitch-black room with a 500-nit monitor forces your eyes to work overtime. Add some ambient light. Even a $10 desk lamp pointed at the wall behind your monitor reduces eye strain significantly.
Mistake #3: Using the Built-In Monitor Stand
The stand that comes with your monitor is terrible for ergonomics. It's too short (your eyes end up looking at center screen, not the top third), it doesn't adjust smoothly, and it takes up half your desk space. A $45 monitor arm is the cheapest upgrade that transforms your gaming posture.
Mistake #4: Sitting With Your Elbow Under the Desk
If your desk has a solid front panel (like a traditional computer desk with a keyboard tray drawer), your elbows might be hitting the bottom panel of the desk. This forces your shoulders up and creates tension in your neck and traps. Make sure your elbows can hang naturally at 90 degrees without anything blocking them.
Mistake #5: Ignoring the 20-20-20 Rule
Every 20 minutes of screen time, look at something 20 feet away for 20 seconds. This relaxes your ciliary muscles (the ones that control lens shape for near vision). If you don't do this, your eyes slowly accumulate accommodation strain over the session — which is why everything looks slightly blurry when you stand up after a 4-hour grind.
Mistake #6: High Mouse Sensitivity + Small Mouse Pad
High sensitivity forces wrist aiming — tiny, repetitive movements that strain the forearm tendons. A large mouse pad gives you space to lower your sensitivity and use arm aiming, which distributes the load across your larger shoulder and back muscles. It's also better for your aim (lower sensitivity = more precise tracking). Win-win.
Mistake #7: The "Just Deal With It" Mentality
The most common mistake of all: thinking that pain is normal. "Oh, my back always hurts when I game." "Yeah, my wrist is sore, but that's just how it is." No. Pain is a signal that something in your setup is wrong. Address it before it becomes chronic. A $20 investment in a lumbar cushion or a $50 monitor arm is a much better use of your money than physical therapy appointments down the road.
Frequently Asked Questions
Most gaming chairs are not good for ergonomics—they're designed to look like racing bucket seats, with aggressive side bolsters that force your hips into a narrowed position. This restricts natural movement and can worsen lower back tension. The fixed lumbar pillows included with most gaming chairs provide one-size-fits-none support. If you want both aesthetics and ergonomics, look at the Herman Miller Embody Gaming chair, Steelcase Gesture, or a quality ergonomic chair with a headrest.
A standing desk is excellent for gaming because it lets you change posture between matches. During loading screens, between rounds, or during cutscenes, you can stand up, stretch, and reset your position. This breaks up the continuous sitting that causes the most fatigue. A desktop that sits on your existing desk works well if you don't want to replace your entire gaming desk.
Absolutely—it affects both comfort and performance. If your monitor is too low, you'll crane your neck forward, causing upper back and neck strain during long sessions. If it's too high, you'll look up, straining your eyes and causing dry eye. The top of the screen should be at or slightly below eye level. A monitor arm gives you the ability to fine-tune height, angle, and distance for each game genre.
For keyboard and mouse gaming, your elbows should be at roughly 90 degrees with forearms parallel to the floor. For controller gaming, you may want the desk slightly lower so your arms rest more naturally in your lap. A standard desk at 29-30 inches works for most people, but if you find yourself hunching, a keyboard tray can help. Standing desk converters are also great for switching between seated and standing gaming.
Very important—especially for mouse-heavy genres like FPS, MOBA, and RTS games. A good mouse pad with a wrist rest provides support between intense aiming sessions. A vertical mouse or trackball can help if you already have wrist pain. If you game for 3+ hours at a time, wrist stretches and regular breaks are essential to prevent repetitive strain injuries.
A good headset keeps your neck in a neutral position—no hunching to hear better. Look for lightweight headsets under 300g to reduce neck strain during long sessions. If you prefer speakers, position them at ear level and equal distance from your head. Wireless headsets eliminate cable pull that can tug on your head during intense moments.
Bias lighting behind your monitor reduces eye strain by balancing the contrast between the bright screen and dark walls. Avoid having a bright light source directly behind or above your monitor—it creates glare. A dimmable lamp to the side provides ambient light without washing out the screen. RGB strip lighting can look great but make sure it's indirect light, not directly in your field of view.
Cable management for gaming is more complex because you have thicker cables (display cables, power cables, headset cables) and peripheral cables that may need to reach further. Use a cable raceway under the desk to bundle the large power and display cables. Use a cable sleeve for the bundle going from your desk to your PC tower. Keep keyboard and mouse cables tidy with a cable bungee or adhesive clips.
RGB can help with ergonomics if used as indirect ambient lighting—it reduces the contrast between your screen and the room, which reduces eye strain. Set RGB strips to a warm white or soft color at about 30-50% brightness. Avoid flashing or strobing effects in your peripheral vision—they can cause eye fatigue and headaches during long sessions.
Bottom Line: Start With Your Pain Points
You don't need to overhaul your entire setup at once. Look at what hurts, and fix that specific thing first.
- Neck hurts? Fix your monitor height (top third at eye level, monitor arm if needed).
- Lower back hurts? Fix your chair lumbar support, or get a chair with proper lumbar.
- Wrist hurts? Lower your mouse sensitivity (start arm aiming), adjust your keyboard tray height, try a different mouse grip.
- Eyes burning? Add bias lighting, lower your brightness, take 20-second breaks every 20 minutes.
- Headaches? Full setup audit — lighting, blue light, headset clamping force, neck posture, all of the above.
Gaming ergonomics isn't complicated. It's about eliminating the repetitive stressors that your body wasn't designed to handle. You don't have to choose between gaming and health. You're a gamer — you optimize things. Optimize your body the same way.
Get personalized gaming setup recommendations based on your body, budget, and play style. Takes 2 minutes.
Sources & further reading: Cornell University Ergonomics Lab — computer workstation guidelines; RSI (Repetitive Strain Injury) awareness research from the American Academy of Orthopaedic Surgeons; Ohio State University Spine Research Institute — sitting biomechanics; community discussions on r/ErgonomicGaming, r/GamingSetups, and r/MechanicalKeyboards; product performance data from RTINGS.com and scientific reviews on PubMed for blue light and eye strain research.