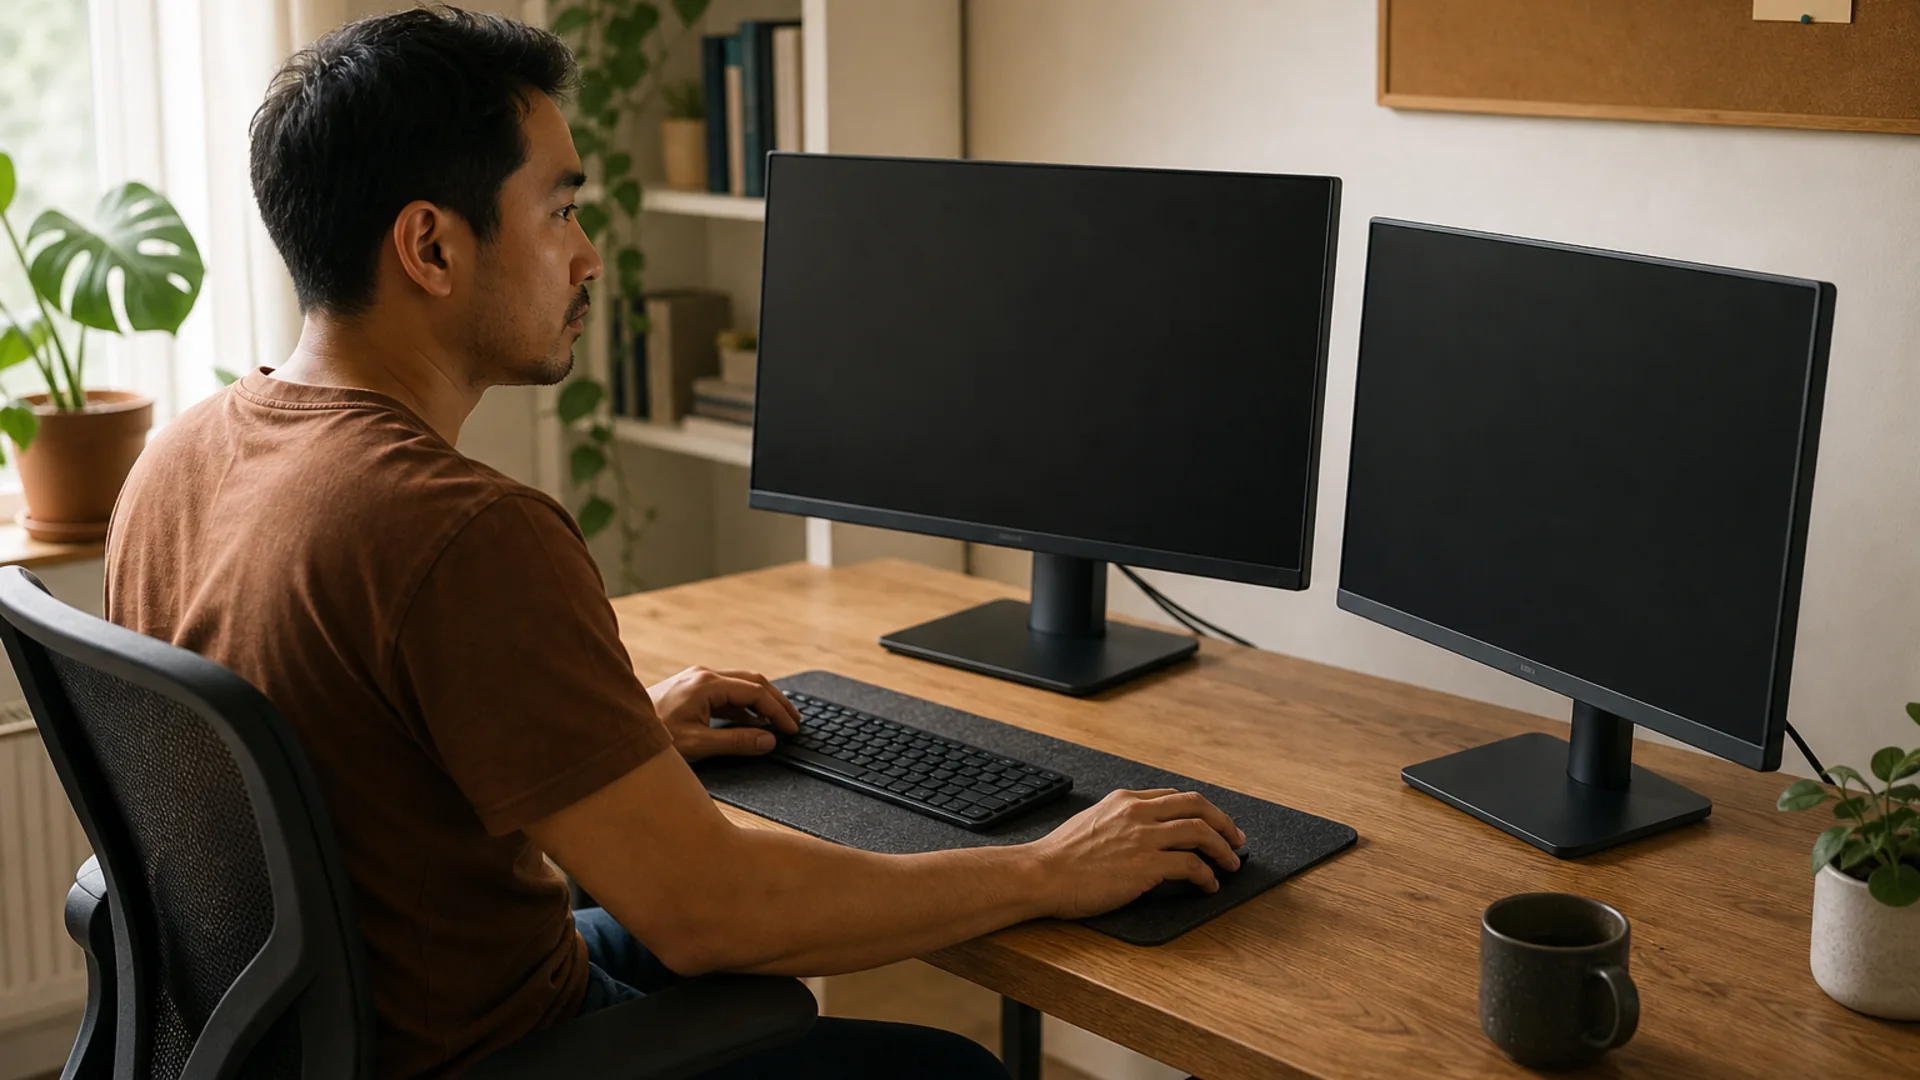
A practical reading of dual monitor setup productivity
Let task frequency determine which screen owns the neutral position.
Angle and distance should support easy scanning without leaning.
Some links in this guide are affiliate links. If you buy through them, we earn a small commission at no extra cost to you. We only recommend products we've researched thoroughly and genuinely believe in. Full disclosure.
You've heard the claims: dual monitors make you faster, more productive, and less frustrated. But is it actually true — or is it just another tech myth perpetuated by people who really, really want a second screen for their Discord window?
Spoiler: it's true. Research consistently finds that a well-configured dual monitor setup measurably improves task efficiency. But here's the catch nobody talks about: if you set them up wrong — wrong height, wrong angle, wrong position — you'll undo most of that productivity gain and add neck strain on top of it.
This guide covers everything: the research, the ergonomics, the hardware decisions, the cable management, and the software tricks that make dual monitors actually work. No fluff. No fake "we tested this for 500 hours." Just research, real-world experience, and honest recommendations.
The Research: Do Dual Monitors Actually Boost Productivity?
Let's start with the headline number you'll see everywhere: a 42% increase in productivity when using dual monitors. That figure comes from a well-cited 2017 study by Jon Peddie Research, which found that multi-monitor users completed tasks 42% faster than single-screen users. Specifically, the study tracked real-world office tasks — document editing, spreadsheet work, email management — and measured time-to-completion across single and dual monitor setups.
Before you bookmark that stat and call it a day, here's what the research actually says when you look past the headline:
- Task-switching costs drop significantly. A University of Utah study found that multi-monitor setups reduced window-switching actions by roughly 50%. Every time you alt-tab or click between windows, you lose a fraction of a second — and over the course of a day, those fractions add up. Dual monitors don't eliminate task-switching, but they make it dramatically cheaper.
- Perceived workload decreases. A 2018 study published in Applied Ergonomics found that participants reported lower mental effort when using dual displays versus a single large display for multi-window tasks. Your brain doesn't have to work as hard to keep context across screens.
- The benefit varies by task type. The productivity gain is most pronounced for tasks that involve referencing one document while working in another — writing with a source open, coding with documentation, financial modeling, data analysis. For single-focus tasks (full-screen video editing, gaming), a single large screen may actually work better.
So yes, the 42% figure is real — but it's an average across specific task types, not a guarantee that you'll magically get 42% more done just by plugging in a second monitor. What matters is how you set it up and what you do with it.
Choosing the Right Monitors for a Dual Setup
You can't just grab two random monitors and call it a day. Well, you can — but mismatched monitors create a frustrating experience. Here's what to prioritize when picking screens for a dual setup.
Size and Resolution Matching
Rule one: match your resolutions exactly. If one monitor is 1440p and the other is 1080p, dragging a window from one to the other will cause instant size distortion — a full-screen window on the 1440p monitor will be huge on the 1080p monitor. Windows and macOS try to compensate, but it never feels right.
The sweet spot for most people is two 27-inch monitors at 2560×1440 (1440p). Here's why:
- 27-inch gives you enough screen real estate without being so wide that you have to turn your head excessively. Two 27-inchers side-by-side is roughly 48 inches of horizontal screen — about the width of a standard desk.
- 1440p hits the sweet spot between sharpness and performance. You get crisp text, plenty of room for multiple windows side-by-side on each screen, and it doesn't require the GPU horsepower that 4K does. Unless you're doing photo or video work, 1440p is probably the right call.
- 4K (3840×2160) is worth the upgrade if you work with high-res media, do design work, or simply want the sharpest text possible. Just know that you'll need to scale the UI (125% or 150%) to keep text readable, which reduces the usable real estate advantage over 1440p.
If you already own one monitor and want to add a second, try to match the resolution and approximate pixel density. A 27-inch 4K monitor paired with a 27-inch 1440p monitor works if you set the 4K to 150% scaling — the perceived size of UI elements will be similar, even though the 4K monitor is sharper.
Panel Type
- IPS — The standard recommendation for productivity. Excellent color accuracy, wide viewing angles (important for side monitors), and decent contrast. If you're not gaming, go IPS.
- VA — Better contrast than IPS, which means deeper blacks. Good if you also watch media on your monitors. Narrower viewing angles, but for a direct-facing setup that doesn't matter much.
- OLED — Gorgeous but expensive and at risk of burn-in with static UI elements (taskbars, toolbars). Not recommended for a productivity-focused dual setup.
- TN — Avoid for productivity. Poor viewing angles and color reproduction. Fine for competitive gaming, terrible for reading text.
Bezels Matter More Than You Think
The bezel — that plastic border around the screen — is the enemy of a seamless dual monitor experience. When two monitors sit side by side, their combined bezels create a gap in your field of view. That gap is where your cursor disappears, where windows get lost, and where the illusion of a single continuous workspace breaks down.
Look for monitors with thin bezels (sometimes marketed as "frameless" or "borderless" — they still have a bezel, it's just very thin). Modern productivity monitors like the Dell U2723QE have bezels under 6mm, which makes the gap between screens barely noticeable.
Connectivity
Make sure your monitors have the ports your computer supports. USB-C is increasingly common on modern laptops and can carry video, data, and power over a single cable. If your laptop supports USB-C with DisplayPort Alt Mode or Thunderbolt, look for monitors with USB-C input — ideally with power delivery so your second monitor can also charge your laptop.
- Laptops with USB-C/Thunderbolt → look for monitors with USB-C input and 65W+ power delivery
- Desktop PCs → HDMI 2.0 or DisplayPort 1.4 are standard. Make sure your GPU has two matching ports.
- MacBooks → USB-C or Thunderbolt. Some older Macs don't support multi-stream (MST) over USB-C, so you may need a dock.
Optimal Monitor Placement: Distance, Height, and Angle
Here's where most people get it wrong — and why your neck hurts after eight hours.
Distance
Both monitors should be the same distance from your eyes. The standard ergonomic recommendation is an arm's length away — roughly 20 to 30 inches from your face. When you sit back in your chair and extend your arm, your fingertips should just barely touch the screen.
If one monitor is significantly closer or farther than the other, your eyes have to constantly refocus as you shift your gaze between them. That refocusing — called accommodation — is a major source of eye strain in multi-monitor setups.
Height
This is non-negotiable: the top bezel of both monitors should be at or slightly below your eye level when you're sitting in your natural working posture. Why? Because your eyes naturally prefer to look slightly downward — about 15 to 20 degrees below horizontal. If the center of your screen is at eye level, you're actually looking up at the top half of the screen, which strains your neck over time.
In practice: sit up straight, close your eyes, relax your neck, then open them. Your natural gaze should land at about the top third of your monitor. If it lands at the center or higher, your monitors are too tall.
This is the single biggest argument against using the stands that come with your monitors (more on that in the monitor arms section). Most stock stands don't have enough height adjustment to get monitors low enough for proper ergonomics.
Angle
Your two monitors should form a slight arc around you — not a flat wall. The ideal configuration is to angle each monitor slightly inward so they form a gentle V shape, with you at the point. Each monitor should be rotated about 15 to 20 degrees from straight ahead.
Why? A flat configuration forces your neck to turn more to see the far edges of each screen. An angled setup keeps the inner edges closer together (reducing the bezel gap) and keeps each screen more directly facing your eyes. Think of it like sitting at a curved desk — the arc follows your natural field of view.
One common mistake: angling the monitors so aggressively that they form a 90-degree L shape around you. This forces you to turn your whole torso to see the secondary screen, which leads to lower back and shoulder strain. Keep the angle gentle.
Primary vs. Secondary Positioning
Conventional wisdom says your primary monitor should be directly in front of you and your secondary monitor off to the side. That's correct — but the details matter more than most guides admit.
Primary Monitor — Dead Center
Your primary monitor — the one you do your main work on — goes directly in front of you. This is the screen your spine is aligned with. When you sit in your chair and look straight ahead, you should be looking at the center of your primary monitor (or slightly left of center, since most of us read and work left-to-right).
If you use a laptop as your primary machine, the laptop screen should be your primary monitor — raised to the correct height on a laptop stand. Don't put your laptop off to the side and use an external monitor as primary. That's a recipe for neck strain.
Secondary Monitor — Left or Right?
The secondary monitor goes to the side of your primary screen, angled slightly inward. Which side? It depends on your work patterns:
- Put your secondary monitor on the same side as your dominant eye for quick glance-based tasks. If you're right-eye dominant, the right side is slightly more comfortable for frequent glances.
- Put reference materials on your non-dominant side. If you're a writer who keeps research open on a second screen, put it on your left (if you're right-handed) — your dominant hand stays at the keyboard on your primary screen, and you glance left for reference.
- Vertical orientation? A secondary monitor rotated to portrait mode is excellent for code, long documents, Slack/chat windows, and reading PDFs. In that case, the monitor arm becomes critical — you'll need a monitor arm with full rotation to switch between landscape and portrait easily.
The Head-Turn Test
A quick self-check: when you look at the far edge of your secondary monitor, does your head turn more than 30 degrees from center? If yes, the monitor is too far to the side. Move it closer, increase the angle, or consider a smaller monitor. Your neck can handle frequent small movements; it can't handle sustained rotation of 45 degrees or more.
Monitor Arms vs. Stands
If you take only one piece of advice from this guide, make it this: buy a dual monitor arm. The stands that ship with monitors are adequate for single-monitor use but actively work against you in a dual setup.
Why Stock Stands Fail
- Fixed height. Most stock stands offer minimal height adjustment. They're designed to sit on a desk with the screen at a height that works for an average person sitting in an average chair — which means they're wrong for anyone who isn't exactly average.
- Bulk. Two stock stands take up a massive footprint on your desk. Those V-shaped bases extend forward under your monitors, eating into your usable desk space. That's where your keyboard, mouse, and coffee should be.
- No independent positioning. With stock stands, you're stuck with whatever angle and position the stands give you. You can't bring the monitors closer together (the bezel gap is as wide as the stands allow) or fine-tune the angle surgery.
What a Good Dual Monitor Arm Gives You
- Height adjustment. You can drop the monitors low enough for proper ergonomic height, no matter your chair or desk height.
- Zero footprint. The arm clamps to the back edge of your desk. The entire desk surface is freed up.
- Seamless positioning. You can bring the inner bezels nearly touching, angle each monitor independently, and adjust distance with a touch.
- Cable management. Most dual monitor arms have integrated cable channels that run along the arm, keeping your cables tidy.
Budget vs. Premium
The Amazon Basics Dual Monitor Arm is a solid entry point at around $35. It's a basic gas-spring arm that supports two monitors up to 27 inches and about 18 pounds each. It works — but the gas springs can lose tension over time, and the build quality is noticeably plasticky.
At the premium end, the Ergotron LX Dual Monitor Arm (around $249) is the gold standard for a reason. It's built like a tank, supports heavier monitors (up to 25 pounds each), uses a superior gas-spring mechanism that doesn't sag, and comes with a 10-year warranty. If you plan to keep this setup for more than a year or two, the Ergotron is worth every dollar.
Mid-range options like the VIVO dual monitor arm ($50–$70) offer a good balance — better build than the Amazon Basics, lower price than the Ergotron. Just check that your monitors are on the VESA compatibility list (virtually all modern monitors support the 100×100mm VESA standard).
Cable Management for Dual Monitors
A dual monitor setup means at least four cables hanging off your desk — two power cables, two video cables (HDMI, DisplayPort, or USB-C), plus potentially USB upstream cables for built-in hubs. Untamed, that's a disaster.
The Cable Route
- Use the monitor arm's cable channels. Most monitor arms have built-in clips, channels, or covers that route cables along the arm structure. Use them. A cable zip-tied to the arm is invisible; a cable dangling from the monitor is not.
- Route cables to a central point. Bring all monitor cables down the monitor arm's central pole, then across the back of your desk to a cable management tray or raceway. If your desk has a grommet hole, route everything through it.
- Use a cable sleeve or split loom tubing to bundle the cables into a single clean run. It looks dramatically better than individual cables.
- Label your cables. Use a labelmaker or simple masking tape tags before you bundle everything. When you need to swap a monitor six months from now, you'll thank yourself.
KVM Consideration
If you switch between a work laptop and a personal computer, a dual-monitor KVM switch lets you use the same monitors, keyboard, and mouse for both machines. Some monitors (like the Dell U2723QE) have built-in KVM functionality — you plug both computers into the monitor, and the monitor acts as the switch. It's a significant convenience upgrade for anyone with a multiple-computer setup.
Window Management Tips and Tools
A second monitor gives you space. Window management software tells your operating system how to use it efficiently.
Built-in Operating System Features
Windows 11: Windows Key + Arrow keys snap windows to quadrants or halves. You can drag a window to the edge of one screen and it'll snap to fill half of it. Drag it to the far edge and it'll jump to the other monitor. Windows Key + Shift + Arrow moves a window to the other monitor while preserving its size and position. Windows 11's Snap Layouts (hover over the maximize button) let you pick a layout and snap windows into place.
macOS: Hold the Option (⌥) key while hovering over the green fullscreen button to access window tiling. macOS Sonoma and later have improved window management, but it's still not as robust as Windows. You can drag windows between monitors by their title bar (or use Control + Command + F for fullscreen toggle). macOS also supports Spaces — separate virtual desktops per monitor — which is useful if your secondary monitor needs to serve multiple purposes throughout the day.
Linux (GNOME/KDE): Both desktop environments have excellent window tiling support. GNOME's built-in tiling works via drag-to-snap or keyboard shortcuts. KDE Plasma offers more granular tiling with custom layouts.
Third-Party Tools Worth Installing
- DisplayFusion (Windows, $35) — The gold standard. Custom monitor profiles, per-monitor wallpapers, advanced window snapping, and multi-monitor taskbars.
- BetterSnapTool / Magnet (macOS, $3–$10) — Adds Windows-style snapping and keyboard shortcuts for macOS. Worth every cent if you're on a Mac and use multiple monitors.
- Rectangle (macOS, free) — Open-source alternative to Magnet. Clean, fast, does exactly what you need without bloat.
- FancyZones (Windows, free, part of Microsoft PowerToys) — Create custom snap zones across your entire monitor setup. You can design a layout where windows snap to specific positions that span both monitors. Incredibly powerful.
- Alt-Tab Terminator (Windows, free) — Enhanced alt-tab that shows thumbnails from both monitors in one browser-style view.
Practical Workflow Patterns
- Writing: Primary screen = editor. Secondary = research/browser/notes. No alt-tabbing.
- Coding: Primary = IDE. Secondary = documentation, terminal, Slack, browser dev tools.
- Design: Primary = design tool (Figma, Photoshop). Secondary = reference images, asset library, Slack.
- Finance/Spreadsheets: Primary = active sheet. Secondary = reference sheet, data source, email.
- Project Management: Primary = current task/document. Secondary = calendar, email, chat, project board.
The key across all patterns: your primary screen gets the active task. Your secondary screen gets context, reference, and communication tools. Train yourself not to drag work between screens — decide which screen is for "doing" and which is for "referencing," then stick to it.
Ultrawide vs. Dual Monitors
You might be wondering: why bother with two separate monitors when you could get one ultrawide? It's a legitimate question, and the answer depends on what you value.
The Case for Ultrawide
- No bezel gap. One continuous surface. If you've ever had a window get lost in the bezel gap between two monitors, you know the appeal.
- Better for immersion. If you also game on this setup, an ultrawide is vastly better than two monitors (most games don't support multi-monitor well).
- Simpler cable management. One cable, one power cord, one monitor arm.
- Better for video editing. A timeline that spans the full width of an ultrawide is genuinely helpful.
The Case for Dual Monitors
- Better ergonomics. With two monitors, you can angle each screen toward you. With an ultrawide, the far edges of the screen are at a severe angle to your eyes — you're effectively looking at the sides of the screen.
- More flexibility. You can rotate one monitor to portrait, use different monitor models for different tasks, or adjust each screen's angle independently.
- Lower cost per square inch. Two 27-inch 1440p monitors cost roughly the same as one large ultrawide, but give you more total screen area.
- Better for collaboration. Need to share your screen on a Zoom call? You can share just one monitor. With an ultrawide, remote viewers see a tiny, letterboxed version of your massive screen.
Our take: For pure productivity — document work, coding, data analysis, project management — dual monitors win. For creative work that benefits from a single continuous canvas (video editing, music production, some design workflows) or for a gaming-plus-productivity setup, an ultrawide is worth considering. If you're not sure, start with a single good monitor and add a second one later — you'll spend less than an ultrawide and get more usable space.
Product Recommendations
These are our current top picks based on research, community feedback, and spec analysis. Prices are approximate and fluctuate.
ASUS ProArt PA278QV 27" 1440p
~$299
Best budget pick. 27-inch IPS panel at 2560×1440 with factory-calibrated color (Delta E < 2). 100×100mm VESA compatible. Good for photo editing, writing, and general productivity. The ProArt line is known for solid build quality at a reasonable price.
Pros: Accurate color, decent stand with height adjustment, affordable.
Cons: 75Hz refresh rate (fine for productivity, not for gaming), built-in speakers are weak.
Check Price on Amazon →LG 27UN850-W 27" 4K
~$396
The mid-range sweet spot. 27-inch 4K IPS panel with USB-C connectivity (60W power delivery). DCI-P3 95% color gamut. Excellent for Mac users who want sharp text and single-cable connectivity. The ergonomic stand offers height, tilt, and pivot adjustment.
Pros: USB-C with 60W PD, 4K sharpness, good color coverage, VESA compatible.
Cons: 60Hz (standard for productivity), contrast ratio is average for IPS, slightly wobbly stock stand.
Check Price on Amazon →Dell U2723QE 27" 4K
~$480
Premium choice. 27-inch 4K IPS Black panel — Dell's proprietary IPS Black technology delivers a 2000:1 contrast ratio (twice that of standard IPS), making blacks much deeper. Built-in KVM switch, USB-C with 90W power delivery, ethernet passthrough. The best all-around productivity monitor you can buy.
Pros: IPS Black contrast, KVM switch, 90W USB-C PD, thin bezels, ethernet.
Cons: 60Hz, premium price, overkill if you don't need the hub/KVM features.
Check Price on Amazon →Amazon Basics Dual Monitor Arm
~$35
Budget monitor arm. Supports two monitors up to 27 inches and roughly 18 pounds each. Gas spring mechanism with height and tilt adjustment. Works well enough, but the build quality reflects the price — some plastic components, gas springs can weaken over time.
Pros: Extremely affordable, gets the job done, frees up desk space.
Cons: Plastic feel, shorter lifespan than premium arms, less weight capacity.
Check Price on Amazon →Ergotron LX Dual Monitor Arm
~$249
The gold standard of monitor arms. Supports two monitors up to 25 pounds each (virtually any 27-inch monitor). Gas-spring mechanism that doesn't sag over time. Full height, tilt, swivel, and rotation adjustment. Integrated cable management. 10-year warranty.
Pros: Rock-solid build, 10-year warranty, smooth adjustment, holds heavy monitors.
Cons: Expensive, overkill for lightweight monitors, clamps can be tight on thin desks.
Check Price on Amazon →Prices are approximate as of the time of writing. Use our workspace assessment for personalized recommendations based on your specific work type, body measurements, and budget.
Comparison Table
| Product | Type | Price | Size | Resolution | Panel | Best For | Affiliate Link | Editor's Choice ASUS ProArt PA278QV | Monitor | $299 | 27" | 2560×1440 | IPS | Budget dual setup, photo editing | Amazon | Editor's Choice LG 27UN850-W | Monitor | $396 | 27" | 3840×2160 (4K) | IPS | Mid-range, Mac users, USB-C | Amazon | Editor's Choice Dell U2723QE | Monitor | $480 | 27" | 3840×2160 (4K) | IPS Black | Premium, KVM, multi-device workflow | Amazon | Editor's Choice Amazon Basics Dual Arm | Arm | $35 | — | — | — | Budget arm, entry-level dual setup | Amazon | Editor's Choice Ergotron LX Dual | Arm | $249 | — | — | — | Premium arm, heavy monitors, long-term investment | Amazon |
|---|
Frequently Asked Questions
Yes—but the gain depends on your workflow. Meta-analyses of dual-monitor studies show a 9-30% productivity increase depending on the task. The biggest gains come from tasks that require frequent cross-referencing: coding (reference + editor), writing (research + document), design (tools + canvas), and financial analysis (spreadsheets + reports). For single-focus tasks like deep reading or data entry, the second screen can be a distraction.
The one directly in front of you. Your primary monitor should be centered on your desk and at eye level. Your secondary monitor should be to the side, angled slightly toward you. If one monitor is higher resolution, larger, or has better color accuracy, that should be your primary. For most people, the primary monitor handles active work and the secondary handles reference material, communication tools, and media.
Side by side is more common and works better for most workflows because it preserves the natural horizontal scanning pattern of your eyes. Stacked monitors (one above the other) save horizontal desk space and can work well for tasks where you need vertical reference (coding with documentation above, video editing with timeline below). Stacked setups require a very sturdy mount and a neck-friendly viewing angle. If you have the desk width, side by side is the safer choice.
Built-in OS tools work well: Windows Snap (Win + arrow keys) and macOS (hold Option while dragging). Third-party tools take it further: DisplayFusion (Windows), Magnet (macOS), or Rectangle (macOS, free). These let you create custom snap zones, save window layouts, and move windows between screens with keyboard shortcuts. The key habit: develop muscle memory for sending specific types of windows to specific monitors.
Use different wallpapers or a single spanned image—not the same wallpaper duplicated. A duplicated wallpaper makes the two monitors feel like separate devices rather than one unified workspace. A spanned image creates visual continuity across both screens. Many tools (DisplayFusion, Wallpaper Engine) can set a spanned image across mismatched resolutions.
Proper positioning is critical. The center of your primary monitor should be at eye level. The secondary monitor should be positioned so you don't have to rotate your neck more than 30 degrees to see it. Sit at arm's length from the monitors. Take breaks and consciously move your neck through its full range of motion. If you find yourself constantly turning to one side, consider swapping the primary and secondary roles.
No—60Hz is perfectly adequate for spreadsheets, documents, email, and coding. Higher refresh rates (120Hz, 144Hz) make cursor movement and scrolling feel smoother, which can reduce perceived eye strain during long sessions, but the productivity benefit is marginal. The one exception: if you frequently scroll through long documents or code, the smoother scrolling of 120Hz can subjectively reduce fatigue.
Three monitors can be productive for very specific workflows: day trading (multiple real-time data feeds), video editing (preview + timeline + tools), or system administration (multiple server dashboards). For most people, three monitors create too much head movement and visual noise. Two monitors is the sweet spot; three is for specialists. Start with two and add a third only if you consistently find yourself needing more screen real estate.
Final Thoughts
A dual monitor setup isn't magic. It won't make you 42% more productive by itself — that number comes from studies with optimal configurations and specific tasks. What a good dual setup does is remove friction: the friction of alt-tabbing, the friction of resizing windows, the friction of losing your cursor between monitors. When that friction disappears, you flow into your work faster and stay there longer.
The ingredients are simple: two well-matched monitors at the right height, mounted on a good dual arm, angled toward you in a gentle arc, with cables tucked away and window management tools in place. Get those fundamentals right, and the second screen becomes an extension of your workspace — not a source of strain or distraction.
If you're not sure where to start, narrow it down to what matters most: one solid monitor, one good arm, and a plan for how you'll use the second screen. You can always add the second monitor later. The arm is the true foundation.
2 minutes. Free. No email required.