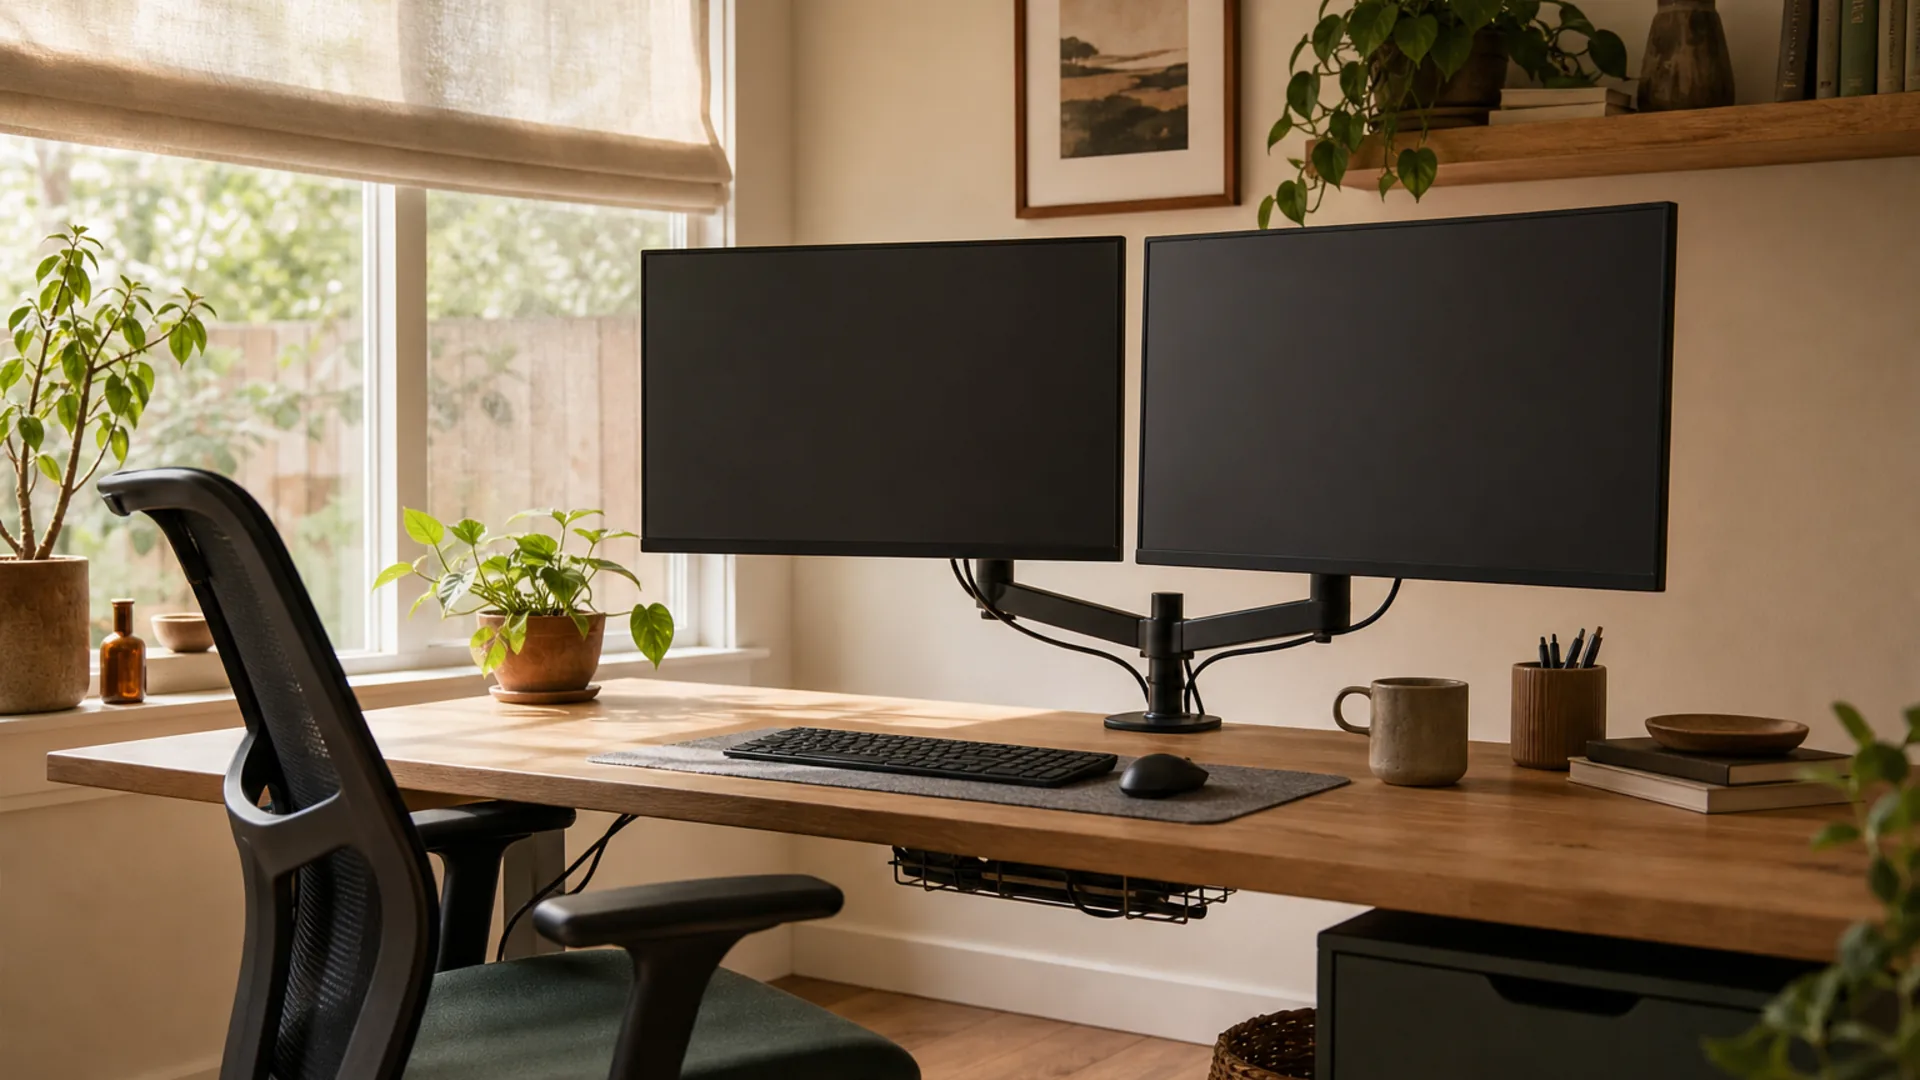
A practical reading of dual monitor home office
Place the screen used most often closest to the neutral gaze.
Depth, glare, and cable paths shape a two-screen layout.
Some links in this guide are affiliate links. If you buy something through them, we may earn a small commission at no extra cost to you. We only recommend products we've thoroughly researched and genuinely believe in.
You've decided to go dual monitor. Good call.
Adding a second screen is one of the most impactful upgrades you can make to a home office — right up there with a good chair and a standing desk. Studies consistently show productivity gains of 20-30% with a dual-monitor setup, and once you've worked with two screens, going back to one feels like typing with one hand.
But here's the thing nobody tells you: a poorly set-up dual monitor rig can wreck your neck, shoulders, and eyes faster than a single monitor ever could. The wider field of view means more head turning. Mismatched heights mean constant craning. Misaligned bezels mean your eyes never settle into a neutral position.
This guide walks through everything — choosing the right monitors, mounting them properly, positioning them for your body, managing the extra cables, and avoiding the common mistakes that turn a productivity boost into an ergonomic nightmare. Let's get it right the first time.
Why Dual Monitors? (The Research)
Before we get into the hardware and positioning, let's talk about why you're doing this. Because if you're going to invest in a second monitor, a dual arm, and the time to set it all up, it's worth understanding what the research actually says.
The Productivity Numbers
The most frequently cited study on multi-monitor productivity comes from Jon Peddie Research, which found that dual-monitor setups improve productivity by an average of 42% for knowledge workers. That's a staggering number, and while the exact percentage varies by task type, the overall finding has been replicated across multiple studies:
- Utah State University (2012): Participants completed document-editing tasks 42% faster with a dual-monitor setup compared to a single monitor.
- Microsoft Research (2010): Dual screens reduced task completion time by 28% in a study of financial analysts working with spreadsheets and data visualization.
- NEC/Marketview Research (2009): Workers were 30% more productive on a dual-monitor setup, with 50% less task-switching between applications.
The productivity gain comes down to a simple principle: context switching costs time. Every time you Alt-Tab between a document and a web browser, your brain needs a moment to reorient — research suggests it takes about 23 minutes to fully regain focus after an interruption. A second monitor doesn't eliminate interruptions, but it dramatically reduces the need to switch contexts. Your reference material lives on one screen, your active work on the other.
What a Dual Monitor Setup Changes About Your Workflow
Here's what a dual monitor setup does for the most common home office tasks:
- Coding: Editor on one screen, terminal/browser/dev tools on the other. No more Alt-Tabbing between your code and the documentation.
- Writing: Research and notes on one side, your document on the other. Or outline on one, draft on the other.
- Design: Canvas on the primary monitor, toolbars and reference images on the secondary.
- Data analysis: Spreadsheet or database on one screen, visualization/report on the other.
- Video meetings: Meeting on one screen (often sharing slides), your notes or presentation materials on the other.
The Ergonomic Challenge
Here's the catch: more screen real estate doesn't automatically mean better ergonomics. In fact, a dual-monitor setup introduces ergonomic challenges that a single monitor doesn't have.
With one monitor, the ergonomic rules are straightforward — center it at eye level, arm's length away, tilt it back slightly. With two monitors, you have to decide which one is primary, how to orient them relative to each other, and how to position your body so you're not constantly twisting your neck.
A 2019 study in the journal Applied Ergonomics found that workers using dual monitors showed increased neck and shoulder muscle activity compared to single-monitor users — specifically when the monitors were placed too far apart or at different heights. The fix isn't to go back to one monitor; it's to set up your two monitors correctly.
That's exactly what this guide is for.
Choosing the Right Monitors
If you're building a dual-monitor setup from scratch, the most important decision you'll make is which monitors to buy. A well-matched pair will feel seamless. A mismatched pair will drive you crazy every single day.
Match Your Monitors
The single most important rule: your two monitors should be as similar as possible. Matching size, resolution, panel type, and color calibration will save you endless frustration.
When monitors don't match, the cursor travels across at different physical distances depending on the direction, windows snap to different effective sizes, colors look different side by side, and your eyes constantly need to readjust. It's not the end of the world — many people run mismatched setups just fine — but if you're buying new, buy two of the same model or two very similar models from the same generation.
Size
For a home office, the sweet spot is 27 inches per monitor. At this size, a pair fits comfortably on a standard 60-inch desk, and the vertical height is enough to view full-page documents without excessive scrolling.
Smaller monitors (24 inches) work for tighter desks but feel cramped for productivity work. Larger monitors (32 inches) are fantastic for immersion but require a deeper desk to maintain proper viewing distance, and two side by side will dominate your entire field of view — you may find yourself turning your head too much.
If you're considering mixing sizes (e.g., one 27-inch and one 24-inch), put the larger one as your primary and the smaller one vertically oriented (portrait mode) as your secondary. More on that below.
Resolution
For 27-inch monitors, 4K (3840×2160) is the ideal resolution. It provides sharp text, plenty of screen real estate, and looks modern for years to come. At this size, 4K at default scaling (usually 150% on Windows, 200% on Mac) gives you crisp, readable text.
1440p (2560×1440) is a fine fallback — it's significantly cheaper and still looks good, especially if your GPU or laptop struggles with dual 4K output. Many gamers prefer 1440p at high refresh rates over 4K at 60Hz.
Avoid 1080p at 27 inches. The pixel density is low enough that text looks noticeably soft, and it won't age well as higher-resolution displays become the norm.
Panel Type
For productivity, IPS (In-Plane Switching) is the clear winner. IPS panels offer accurate colors, wide viewing angles (critical when you have two monitors at different angles), and consistent brightness across the screen. Avoid TN panels — they have poor viewing angles and colors shift when you're not looking straight on. VA panels are a reasonable middle ground but suffer from slightly slower response times and less consistent color than IPS.
If you're a designer or photographer, look for monitors with factory-calibrated sRGB (or DCI-P3) color accuracy. The Dell UltraSharp and ASUS ProArt lines are the go-to choices here.
Bezels: Thinner Is Better
In a dual-monitor setup, the bezels of your two monitors meet in the middle. Thick bezels create a visual gap that makes it harder to track content across both screens. Look for thin-bezel or "frameless" designs with bezels under 5mm on the sides that will meet in the center.
The industry term is "3-side borderless" or "micro-edge" — the bezels on the top and sides are minimal, with only the bottom bezel being thicker. When you put two of these side by side, the combined bezel gap in the center is around 8-10mm, which is barely noticeable.
VESA Mount Compatibility
This is crucial. If you plan to use a monitor arm (and you absolutely should — more on that in the next section), your monitors need to have a VESA mount pattern on the back. The standard is 100×100mm VESA. Most 24- to 32-inch monitors support it, but always double-check the specs before buying.
Some ultra-thin or budget monitors omit the VESA mount entirely or require a proprietary adapter. Avoid those unless you're committed to using the stock stands.
USB-C with Power Delivery
If you use a laptop, this is a game-changer. A monitor with USB-C input that delivers power delivery (PD) lets you connect your laptop with a single cable — video, data, and charging all through one wire. Look for at least 65W PD (enough to charge most laptops), ideally 90W or higher for larger machines.
In a dual-monitor setup, you typically need one monitor with USB-C/PD that acts as the hub for your laptop, and the second monitor connects via HDMI or DisplayPort (often daisy-chained through the first monitor's USB-C downstream port if it supports DisplayPort Alt Mode).
Monitor Arms vs. Stands — Why Arms Win
You can set up two monitors using their included stands. Many modern monitors have decent stands with tilt, swivel, and height adjustment. But for a truly ergonomic dual setup, a monitor arm (or a dual arm) is a massive upgrade.
What Stock Stands Can't Do
Even the best stock stand has limitations:
- Footprint: Each stand takes up roughly 8×10 inches of desk space. With two stands, that's about 160 square inches of precious desk real estate gone — space you could use for your keyboard, notepad, or coffee.
- Height range: Most stock stands offer 4-5 inches of height adjustment. That's often not enough to get both monitors to exactly the right height, especially if you're tall and need the screens higher.
- Independent positioning: With two separate stands, you're limited by the stands' base positions. You can't easily pull one monitor closer or tilt it differently without moving the entire base.
- Alignment: Getting two separate stands to sit at exactly the same height, angle, and distance is fiddly and rarely stays put.
What a Monitor Arm Gives You
A gas-spring or heavy-duty monitor arm gives you full 6-axis adjustment: height, tilt, swivel, rotation, extension, and retraction. With a dual arm (one base that holds two monitors), you can:
- Float both monitors above the desk, reclaiming all that desk space
- Adjust height independently for each monitor
- Tilt each screen toward your face for optimal viewing
- Rotate a screen to portrait mode in seconds
- Move monitors in and out as needed for different tasks
- Hide cables through the arm channels for a clean look
The only downside is the upfront cost. A good dual arm runs $100-$300, depending on the brand and build quality. The VIVO Dual Monitor Arm is the budget standard at around $40; the Ergotron LX Dual is the gold standard at about $250. Both are excellent for their price points.
Dual Arm vs. Two Single Arms
You have two mounting options: a single dual arm (one pole, two arms, one clamp) or two single arms (two poles, two arms, two clamps).
Dual arm: Cleaner look, cheaper (one base instead of two), one cable to manage. But you're locked into a fixed pole position — if your desk layout changes, you move the whole assembly.
Two single arms: Maximum flexibility — you can position each monitor completely independently and move them independently when you rearrange. More expensive, more clamps, more cables. But if you ever want one monitor on a different desk or in portrait while the other stays landscape, this is the way to go.
For most people, a dual arm is the right choice. Two singles are for tinkerers and people who frequently change their layout.
Optimal Positioning: Height, Distance, Angle
Here's the really important section — the one most people skip. The positioning of your monitors determines whether your dual setup helps or hurts your body.
Primary vs. Secondary
The first decision: which monitor is primary, and where does it go?
The primary monitor goes directly in front of you. This is non-negotiable. Your chair and keyboard are centered on the primary monitor. Your head faces forward, not to the side. The secondary monitor sits to the left or right, depending on your preference and desk layout.
Which side for the secondary? Research on visual field preference is mixed, but a few rules of thumb:
- If your work involves reading and writing (your secondary screen holds reference material), place it on the side of your dominant eye. Most people are right-eye dominant, meaning the right side feels more natural for reading.
- If your secondary screen holds toolbars, communication apps, or monitoring dashboards, either side works — just pick the side with more desk space.
- Some people prefer the secondary on the left so their primary (right-hand) side stays clear for note-taking or a phone.
Try both sides for a week. You'll know within a day or two which side feels natural.
Height
The rule is the same as single-monitor ergonomics: the top bezel should be at or slightly below eye level. When you sit up straight and look forward, your eyes should naturally land in the upper third of the screen — not at the very top, not in the middle.
For a dual setup, both monitors must be at the same height. If one is even an inch higher than the other, your eyes and neck will feel the difference within an hour. This is why monitor arms are so valuable — you can dial in the exact same height for both screens, and they'll stay there.
Distance
Arm's length. Sit back in your chair, extend your arm forward — your fingertips should just barely touch the screen. This puts the monitor about 20-28 inches from your eyes, which is the ideal viewing distance for most people.
Both monitors should be at the same distance. If the secondary is further back (which happens naturally when you angle it), your eyes have to refocus every time you glance over — that's a recipe for eye strain.
With a monitor arm, you can pull the secondary monitor forward so it's at the same distance as the primary. This makes a much bigger difference than most people expect.
Angle
The two monitors should form a gentle arc around you — not a straight line. The primary faces you directly. The secondary is angled toward you, typically at 15-30 degrees.
Arc them in so both screens are roughly equidistant from your eyes. If they're flat in a straight line, the outer edges of each screen are much further from your eyes than the center, and you'll be turning your head constantly to see the edges.
The ideal arc radius is about 30 inches — the same as your viewing distance. Imagine a circle centered on your head with a 30-inch radius; both monitors should be tangent to that circle.
Portrait vs. Landscape
Some people run one monitor in portrait mode (vertical) as their secondary. This is excellent for:
- Code (long lines of code fit perfectly on a landscape primary; a portrait secondary shows more lines vertically)
- Reading documents, PDFs, or long articles
- Slack/Discord/Teams — the vertical chat list benefits from portrait height
- Monitoring dashboards or logs
If you go portrait, use a monitor arm with rotation capability (most do). Make sure the monitor itself has a true 90-degree pivot — not all monitors do, even if they're VESA-compatible.
One ergonomic note on portrait: the top of the screen needs to be even lower than with landscape, because you're now looking at a much taller display. Set the top of the portrait monitor at eye level — not the center — so you don't have to look up to see the top of it.
Desk Considerations for Dual Monitors
Your desk matters more than you think. A dual-monitor setup makes demands on your desk that a single monitor doesn't.
Desk Depth
Minimum: 24 inches. Ideal: 30 inches.
Most standard office desks are 30 inches deep, which is ideal. At this depth, a 27-inch monitor on an arm gives you about 20-24 inches from your eyes to the screen — perfect viewing distance with room for your keyboard, mouse, and a notepad in front of the screens.
At 24 inches deep, you're pushing the minimum. You'll have about 16-18 inches of viewing distance, which is tight but workable. Consider mounting the monitors on wall arms (which extend from the wall behind the desk) to reclaim the desk surface.
At 20 inches or less, you're fighting an uphill battle. Wall-mounting or using a monitor arm that clamps to the back edge and extends forward is your best bet.
Desk Width
Minimum: 55 inches (to fit two 27-inch monitors side by side). Ideal: 60 inches or wider.
Two 27-inch monitors are roughly 24 inches wide each (plus bezels), so side by side they need about 50 inches of horizontal space. At 55 inches, you have a couple inches of breathing room on each side. At 60 inches, you have more comfortable margins plus room for speakers, a lamp, or a plant.
If your desk is narrower than 55 inches, consider smaller monitors (24-inch) or stacking one above the other (which requires a different type of arm).
Weight Capacity
This is easy to overlook. A typical 27-inch monitor weighs 10-15 pounds. Two monitors plus a dual arm (which itself weighs 5-8 pounds) puts 25-35 pounds of force on your desk — specifically, on the point where the arm is clamped.
Most solid-wood or engineered-wood desks handle this without issue. But cheap laminate desks, glass desks, and thin IKEA tabletops (like the Linnmon) can flex, crack, or sag under the concentrated pressure of a clamp-on monitor arm.
If your desk has a hollow-core or honeycomb interior, use a monitor arm with a wide clamping base or a reinforcing steel plate (many arms include one) to distribute the load. Or consider a desk-mounted grommet mount instead of a clamp — it distributes the force through a small hole in the desk surface, which is actually stronger than edge-clamping on a hollow desk.
Cable Pass-Through
A desk with a built-in cable grommet (a hole in the surface, usually 1.5-2 inches in diameter) is a huge help for dual-monitor setups. Run all your monitor cables through the grommet to the cable tray underneath. If your desk doesn't have one, you can drill one yourself (steel desks are harder; wood and engineered wood are straightforward) or use an edge-mounted cable clip to run cables over the back edge.
Top Monitor Recommendations by Budget
These recommendations assume you're buying two of the same model. If your budget is tight, you can buy one now and the second later — but buy the same model both times.
Dell S2722QC 27" 4K USB-C Monitor
Budget pick · ~$280 each · Amazon
The best value-for-money 4K monitor for a dual setup. 27 inches, 4K resolution (3840×2160), IPS panel, USB-C with 65W power delivery, built-in speakers, and VESA 100×100 mount compatible. The bezels are thin on three sides, so the gap between two side-by-side monitors is minimal. Color accuracy is good out of the box — not quite UltraSharp level, but very respectable for the price.
At about $280 each, a pair runs you ~$560 total, which is an incredible deal for dual 4K. The main compromise is the stand — it's basic with tilt only (no height adjustment), which is why you'll want a monitor arm.
Best for: Budget-conscious buyers who want sharp 4K text without spending UltraSharp money.
Pair of two: Check price on Amazon →
Dell UltraSharp U2723QE 27" 4K IPS Black
Mid-range pick · ~$420 each · Amazon
This is the monitor I'd recommend to most people. The U2723QE uses LG's IPS Black technology, which delivers a 2000:1 contrast ratio — roughly double what standard IPS panels achieve. That means deeper blacks, better shadow detail, and a noticeably more premium image. It covers 98% DCI-P3 and comes factory-calibrated to Delta E < 2.
Connectivity is excellent: USB-C with 90W power delivery, HDMI, DisplayPort, a USB hub with four downstream USB-A ports, and a USB-C downstream port that supports daisy-chaining. The built-in stand offers full height, tilt, swivel, and pivot adjustment — but you'll still want an arm for desk space and positioning flexibility.
At ~$420 each, a pair will run you about $840. Worth it for the superior contrast and build quality alone.
Best for: Anyone who wants premium image quality and great connectivity without going to $600+ per monitor.
Pair of two: Check price on Amazon →
LG UltraFine 32UN880-B 32" 4K Ergo Stand
Premium pick · ~$700 each · Amazon
The LG UltraFine 32UN880-B is the flagship of LG's productivity monitor line. It's a 32-inch 4K IPS panel with 95% DCI-P3 coverage, USB-C with 96W power delivery, and built-in speakers. The standout feature is the integrated "Ergo Stand" — a C-clamp arm that attaches to the back of your desk, giving you full height, tilt, swivel, and extension adjustment right out of the box. You don't need a separate monitor arm.
At 32 inches, two of these side by side is a lot of screen. You'll need a 72-inch desk minimum to fit them comfortably, and you'll be turning your head more than with 27-inch monitors. Consider using one as your primary and the second in a portrait orientation, or stack them vertically.
The build quality is excellent, the image quality is superb for productivity work, and the integrated Ergo stand is genuinely innovative. At ~$700 each, a pair is a serious investment — but if budget isn't your constraint, this is the setup.
Best for: Professionals who want premium large-format displays without buying separate arms.
Pair of two: Check price on Amazon →
Dell U2724D 27" 1440p IPS
1440p alternative · ~$320 each · Amazon
Not everyone needs 4K. If your GPU struggles with dual 4K, or if you prefer higher refresh rates for occasional gaming, the U2724D is an excellent 1440p option. It uses an IPS panel with 120Hz refresh rate (yes, on a productivity monitor), 99% sRGB coverage, USB-C with 65W PD, and the same excellent UltraSharp build quality. The 120Hz makes desktop navigation feel noticeably smoother than 60Hz.
At ~$320 each, a pair is about $640 — pricier than the S2722QC but with the advantage of higher refresh rate and slightly better ergonomics.
Best for: Productivity users who also game, or anyone whose laptop/desktop can't drive dual 4K.
Pair of two: Check price on Amazon →
Top Dual Monitor Arms by Budget
These are the most consistently recommended arms across forums, subreddits, and professional reviews. Prices are per-arm or per-pair as noted.
VIVO Dual Monitor Arm (STAND-V002)
Budget pick · ~$40 · Amazon
This is the most popular budget dual monitor arm on the market, and for good reason. It's a fully articulating dual arm with gas-spring height adjustment, VESA 75×75 and 100×100 compatibility, and support for monitors up to 22 pounds each (up to 27 inches). The C-clamp base is sturdy, and it includes a grommet mount option.
The gas spring isn't as smooth as premium arms — you might need to adjust the tension a few times to get it right — and the build quality is good but not great. But for $40, it outperforms everything in its price range, and it's more than adequate for a home office setup.
Best for: Anyone on a tight budget who still wants a fully adjustable dual arm.
HUANUO Dual Monitor Arm (HNDS6)
Mid-range pick · ~$80 · Amazon
The HUANUO HNDS6 sits at the sweet spot between budget and premium. It supports monitors up to 27.5 inches and 20 pounds per arm, features a solid steel construction with a sturdier gas spring than the VIVO, and includes integrated cable management channels. The range of motion is excellent — you can position each monitor independently with full articulation.
What separates this from the budget tier: the gas springs feel more consistent (less sagging over time), the C-clamp is wider and distributes pressure better on thinner desks, and the build tolerances are tighter — less wobble when you're typing or bump the desk.
Best for: The sweet-spot buyer who wants noticeably better build quality than budget without paying Ergotron prices.
Ergotron LX Dual Monitor Arm (45-509-216)
Premium pick · ~$290 · Amazon
The Ergotron LX is the gold standard for monitor arms. It's more expensive than anything else on this list — by a lot — but it's the last arm you'll ever buy. The gas spring is butter-smooth, supporting monitors up to 28 inches and 25 pounds each. The construction is all steel and aluminum with no plastic components. The range of motion is vast: 13 inches of height adjustment, 75 degrees of tilt, 360 degrees of rotation, and 22 inches of extension.
The integrated cable management is best-in-class — a matching gray conduit hides cables along the arms. The clamping base is wide and strong enough for any desk material. And Ergotron offers a 10-year warranty, which tells you how confident they are in the build.
Is it worth $290 when the VIVO is $40? If you can afford it, yes. The difference in smoothness, stability, and longevity is significant. For a daily-driver home office setup that you'll use 8+ hours a day, the LX is worth every penny.
If you prefer two single arms instead of a dual, the Ergotron LX Single Arms (~$150 each) give you even more positioning flexibility.
Best for: Anyone who spends 8+ hours a day at their desk and wants the best possible arm stability and adjustability.
Full Comparison Tables
Monitor Comparison
| Spec | Dell S2722QC | Dell U2723QE | LG 32UN880-B | Dell U2724D |
|---|---|---|---|---|
| Size | 27" | 27" | 32" | 27" |
| Resolution | 4K (3840×2160) | 4K (3840×2160) | 4K (3840×2160) | 1440p (2560×1440) |
| Panel Type | IPS | IPS Black | IPS | IPS |
| Refresh Rate | 60Hz | 60Hz | 60Hz | 120Hz |
| USB-C PD | 65W | 90W | 96W | 65W |
| Color Coverage | 99% sRGB | 98% DCI-P3 | 95% DCI-P3 | 99% sRGB |
| VESA Mount | 100×100 | 100×100 | Yes (Ergo base) | 100×100 |
| Built-in Stand | Tilt only | Full adjust | Ergo arm included | Full adjust |
| Price (each) | ~$280 | ~$420 | ~$700 | ~$320 |
| Buy on Amazon | Check price → | Check price → | Check price → | Check price → |
Monitor Arm Comparison
| Spec | VIVO STAND-V002 | HUANUO HNDS6 | Ergotron LX Dual |
|---|---|---|---|
| Price | ~$40 | ~$80 | ~$290 |
| Max Monitor Size | 27" | 27.5" | 28" |
| Weight Capacity (per arm) | 22 lbs | 20 lbs | 25 lbs |
| Height Adjustment | 9" | 12" | 13" |
| Tilt | +85° / -45° | +90° / -45° | +75° / -20° |
| Rotation (Portrait) | 360° | 360° | 360° |
| Cable Management | Basic clips | Integrated channels | Integrated conduit |
| Mount Type | Clamp / Grommet | Clamp / Grommet | Clamp / Grommet |
| Warranty | 3 years | 3 years | 10 years |
| Buy on Amazon | Check price → | Check price → | Check price → |
Step-by-Step Dual Monitor Setup
Here's the exact process for setting up your dual monitors from scratch — assuming you have two monitors, a dual arm, and a desk that can support them.
Step 1: Assemble and Mount the Arm
Follow the arm's instructions to assemble the dual arm. Most dual arms come in two parts: the pole/base assembly and the two arm sections. Attach the arms to the pole, then clamp or grommet-mount the base to your desk.
Position the base roughly at center of your sitting position — not necessarily the center of your desk. The base should be directly in front of where you sit. With a dual arm, the pole is central, and the two arms extend left and right from the center. If the pole is centered on your desk but you sit slightly left or right of center (maybe because of desk layout), the arm positions will feel off.
Step 2: Attach VESA Plates to Monitors
Most monitors have removable back covers that snap off to reveal the VESA mounting holes. Remove the cover, screw the VESA plate onto the back of the monitor (using the screws included with the arm), and don't overtighten. Then snap or screw the cover back into place over the VESA plate.
Step 3: Mount Monitors to Arms
With the VESA plates attached, lift each monitor onto its arm. This is easier with two people if your monitors are heavy. Slide the VESA plate into the arm's quick-release mechanism — most arms have a locking tab or screw that secures the plate. Make sure both monitors are securely locked before letting go.
Step 4: Initial Positioning
With both monitors mounted:
- Set the arm height so the top bezel of each monitor is at or slightly below eye level
- Tilt both monitors back 10-20 degrees
- Position the primary monitor directly centered on your sitting position
- Arc the secondary monitor toward you at roughly 15-30 degrees
- Adjust distance so both monitors are at arm's length
Don't worry about getting it perfect on the first try. Live with it for a day, then make micro-adjustments.
Step 5: Configure Display Settings
On Windows: Right-click desktop → Display Settings → Identify screens (you'll see a "1" and "2" overlay on each monitor). Arrange them in the settings panel to match your physical layout — drag monitor 2 to the left or right of monitor 1 depending on your setup. Set the primary monitor (the one where your taskbar and Start menu live) and adjust scaling to match (both monitors should use the same scaling level, typically 150% for 4K at 27").
On Mac: System Settings → Displays → Arrange. Drag the menu bar to your primary monitor. Mac scaling works a bit differently — "Looks like 2560×1440" is the most common setting for a 27-inch 4K display.
Critical: Ensure both monitors are set to their native resolution. A 4K monitor running at 1080p will look blurry. Go into display settings and confirm the resolution matches the monitor's native resolution.
Step 6: Color Match
Two monitors from the same factory batch usually look very similar, but they won't be identical. Open a white document or webpage on both screens. If the color temperatures differ noticeably, dig into the monitor's on-screen display (OSD) menu and adjust: set both to the same preset (e.g., "Standard" or "sRGB") and the same brightness level. If one still looks warmer or cooler, manually adjust the RGB levels in the OSD menu until they match.
For a more precise match, use a hardware calibrator like the Datacolor Spyder X or X-Rite i1Display. But for most people, matching the OSD presets and brightness is sufficient.
Step 7: Route and Manage Cables
This deserves its own section below. For now, route each monitor's power and video cables through the arm's cable management channels, then down the central pole to your cable tray or desk surface.
Step 8: Fine-Tune After a Day
Use the setup for a full workday. Pay attention to:
- Is your neck turning to see either screen? The secondary might be too far to the side — arc it in more.
- Are you leaning forward to read text? Pull both monitors slightly closer.
- Are your shoulders hunched? The monitors might be too low — raise them.
- Do your eyes feel strained? Check that both monitors are at the same distance and brightness.
Make small adjustments each day for the first week. You'll know when it feels right.
Cable Management for Dual Monitors
Dual monitors = more cables. Here's how to keep it under control.
What You're Dealing With
Each monitor needs at least two cables: power and video (HDMI, DisplayPort, or USB-C). If one of your monitors has a USB hub, it also needs a USB-B upstream cable. That's 4-6 monitor cables plus a power strip for the desk — your cable management has to handle that volume.
The Monitor Arm Advantage
If you bought a monitor arm with integrated cable channels (the HUANUO and Ergotron both have them), use them. Run the cables through the hollow arms and down the central pole. The cables disappear into the arm structure and only emerge at the arm base, where you route them to your under-desk cable tray.
For budget arms without cable channels, use adhesive cable clips on the back of the arm segments. Run cables along the top or bottom of the arm and secure them with clips every 6-8 inches.
Bundle, Don't Leave Hanging
Bundle the cables from both monitors together as they leave the arm base. Use Velcro straps (not zip ties — you'll want to adjust these) to bundle power cables together and video cables together. Then bundle both groups into a single sleeve that runs to your cable tray.
The Power Strip
Put a power strip in your under-desk cable tray. Plug both monitor power cables and your computer's power cable into it. A surge protector is recommended — monitors and their power bricks represent a non-trivial electrical load.
Label Your Cables
With six or more cables coming from two monitors, you can't easily trace which is which. Use a label maker or small piece of masking tape on each cable: "Left Monitor HDMI," "Right Monitor Power," etc. This sounds obsessive until the day something stops working and you can instantly find the right cable.
Common Mistakes and How to Avoid Them
After reading hundreds of forum threads and talking to people about their dual-monitor setups, these are the most common mistakes I see. Avoid these and you're 80% of the way to a perfect setup.
Mistake 1: Different-Sized Monitors
An 24-inch and a 27-inch side by side looks off because the bezel heights don't match and the cursor jumps when you move between them. If you absolutely must use mismatched sizes, align the bottom bezels (not the centers) so the desktop floor is at the same visual level, and set the larger monitor slightly further back so the perceived size difference is minimized. But really, just buy two of the same size.
Mistake 2: Different Resolutions
A 4K primary and a 1440p secondary means the mouse cursor changes speed and scale as it crosses from one screen to the other — it moves further on the 1440p screen for the same physical mouse movement. You can somewhat account for this by adjusting pointer speed, but it never feels right. If you must mix resolutions, use the same physical monitor size (e.g., both 27") and set the 4K monitor's scaling to match the 1440p's effective pixel density — it's a compromise, but it softens the transition.
Mistake 3: Monitors Too Far Apart
The bezels of the two monitors should meet at the center of your vision. If you have to turn your head to see the inner edge of either monitor, they're too far apart. Push them together. A dual arm helps here — you can position both screens so their inner bezels are practically touching.
Mistake 4: Ignoring Cable Management
Two monitors generate twice the cable clutter, and it's easier to do it right the first time than to go back and fix it later. Take the 30 minutes to route cables through the arm channels, bundle them with Velcro, and get a cable tray. Your future self will thank you every time you look at your desk.
Mistake 5: Toppling the Arm
A dual monitor arm with two 27-inch monitors is a cantilevered load of 25+ pounds. If your desk edge is thin or the C-clamp isn't tight enough, the whole assembly can tip forward. Always tighten the clamp firmly, and if your desk has a hollow-core top, use the included reinforcement plate to distribute the load. Test the stability by gently pushing on both monitors before you commit to the setup.
Mistake 6: Forcing Portrait Mode on the Wrong Monitor
Not every monitor is designed for portrait use. IPS monitors work fine in portrait, but VA and TN panels can suffer from color shift and gamma shift when viewed vertically. Also, some monitors have vents on the top edge that are designed for horizontal heat dissipation — running them in portrait can trap heat. Check if your monitor is rated for 90-degree rotation before you pivot it.
Frequently Asked Questions
You can build a solid dual-monitor setup for $600-1,200 depending on monitor quality. Budget-friendly: two 24-inch 1080p monitors at $150-200 each plus a $50-70 dual monitor arm. Mid-range: two 27-inch QHD monitors at $300-400 each plus a $100-150 arm. Premium: two 27-inch 4K monitors at $500-700 each plus a premium arm. Factor in a good monitor arm—it's the most important accessory.
Not at all. Many people run a primary monitor (larger, higher resolution) and a secondary monitor (smaller, lower resolution) perfectly happily. The main consideration is that mismatched resolutions and sizes can create a jarring experience when moving the cursor between screens. As long as the refresh rates and response times are close enough for your use case, mixing monitors works fine.
Most modern computers support dual monitors. Check your PC's graphics card or laptop's video outputs: you need at least two video outputs (HDMI, DisplayPort, USB-C, or Thunderbolt). If your computer only has one output, a USB-to-HDMI adapter ($15-30) can add a second display. Apple Silicon Macs (M1, M2, M3) have specific limitations—some only support one external display natively and need a DisplayLink adapter for dual monitors. Always check your specific model's specs before buying.
Two single arms give you more flexibility—you can position each monitor independently, move them closer or farther apart, and adjust height and tilt separately. A dual monitor arm is cleaner (one clamp, one cable management channel) but limits independent positioning. For most home offices, two single arms are the better choice. If desk space is extremely tight, a dual arm saves clamp area.
Minimum: 55 inches wide by 28 inches deep. This gives you enough width for two 24-inch monitors side by side with some space for a laptop or speakers. Recommended: 60-72 inches wide by 30 inches deep. This comfortably fits two 27-inch monitors, leaves room for a laptop and accessories, and gives proper viewing distance. Depth is critical—at 24 inches deep, 27-inch monitors will feel uncomfortably close.
A dual monitor arm with built-in cable management is the cleanest solution—most arms have channels that route cables along the arm and down a single central post to the desk. Below the desk, a cable tray collects both monitor cables plus your keyboard, mouse, and power cables. Use velcro ties to bundle pairs (power + signal for each monitor) every 6-8 inches. Label both ends of each cable with small wraps or tape for future troubleshooting.
Mount both on arms. Once you experience the adjustability of a monitor arm—height, tilt, swivel, rotation, and distance—you'll never want to go back to a fixed stand. The disparity between an arm-mounted and stand-mounted monitor side by side will drive you crazy because they'll never match height or distance perfectly. Budget $50-70 per arm (or $100-150 for a quality dual arm) and consider it a required investment.
Yes, and many people prefer it. An ultrawide gives you the screen real estate of two monitors without the bezel gap in the middle. It's better for full-screen applications (no break between screens) and works beautifully with window management tools. The trade-offs: you can't angle monitors toward you (which reduces side-screen glare), and if the monitor fails, you lose everything. For gaming and creative work, ultrawide is often superior. For productivity with lots of side-by-side windows, dual monitors still have advantages.
Four strategies: (1) Match brightness and color temperature on both monitors—disparity forces your eyes to constantly adjust. (2) Position monitors at the same distance from your eyes—don't have one closer than the other. (3) Use bias lighting behind the monitors to reduce the perceived contrast between the bright screens and the dark wall. (4) Take frequent breaks and look at something 20+ feet away for 20 seconds every 20 minutes (the 20-20-20 rule).
Bottom Line
A dual-monitor setup is one of the best investments you can make in your home office productivity. The key is doing it right: matching monitors, a good dual arm, proper positioning, and thoughtful cable management.
Don't overthink it. Buy two of the same monitor in your budget range. Buy a dual arm that fits your desk. Spend an afternoon setting everything up and routing the cables. Then live with it for a week, making small adjustments to height, angle, and distance until it feels natural.
Your neck, shoulders, eyes, and productivity will thank you.
Get personalized product recommendations based on your body, budget, and work style — including the perfect monitors and arm for your dual setup.
Sources & further reading: Jon Peddie Research — multi-monitor productivity study; Utah State University — dual-monitor task completion study; Microsoft Research — display configuration impact on task performance; Applied Ergonomics (2019) — neck and shoulder muscle activity in multi-monitor setups; Princeton University Neuroscience Institute — visual attention and clutter research; community discussions on r/Workspaces, r/ultrawidemasterrace, and r/Ergonomics; plus several thousand combined Amazon reviews for all products linked above.